Table of Contents
Starting from February 1st 2023 Facebook mandates Business Verification for Advanced Access. This is required for use of the Facebook login feature. This means that individuals are prohibited from using Facebook login on their websites to provide social login for their visitors; only verified businesses will now have access to this service. For further details on this, please refer to the official statement.
First, you will need to go to Facebook for Developers and to Login into your Facebook Account.
If you are not a Facebook Developer click on “Get Started”, accept the Facebook Platform Policy and the Facebook Privacy Policy, by clicking on Continue.
If your Facebook Account is not verified you will be prompted to verify it. After completing all the requested details click on Complete Registration.
After you Register as a Facebook Developer you will be able to create your first Facebook App. Click on Create App.
Set the Category to Business
Set the Display Name (which is the name of your Facebook App), the Contact Email, and optionally the Business Account. After you’ve finishing to set up the App click on “Create App”.
After clicking on “Create App” you will get redirected to the Settings page within your Facebook Developer Account. Here you will need to click on “Basic”.
Here you will need to set the:
→ App Domains – https://wwww.yourdomain.com
→ Privacy Policy URL – https://www.yourdomain.com
→ Terms of Service URL – https://www.yourdomain.com
You have to scroll down the page and click on “Add Platform”, the following pop-up will open and you have to choose “Website”.
And now enter the URL of your website and click on Save Changes.
After saving the URL of your website click on “Permission and Features”, displayed on the left side.
→ Search for email and click on “Get Advanced Access”
→ Search for public_profile and click on “Get Advanced Access”
From the left menu, click on Add Product -> and Set up Facebook Login.
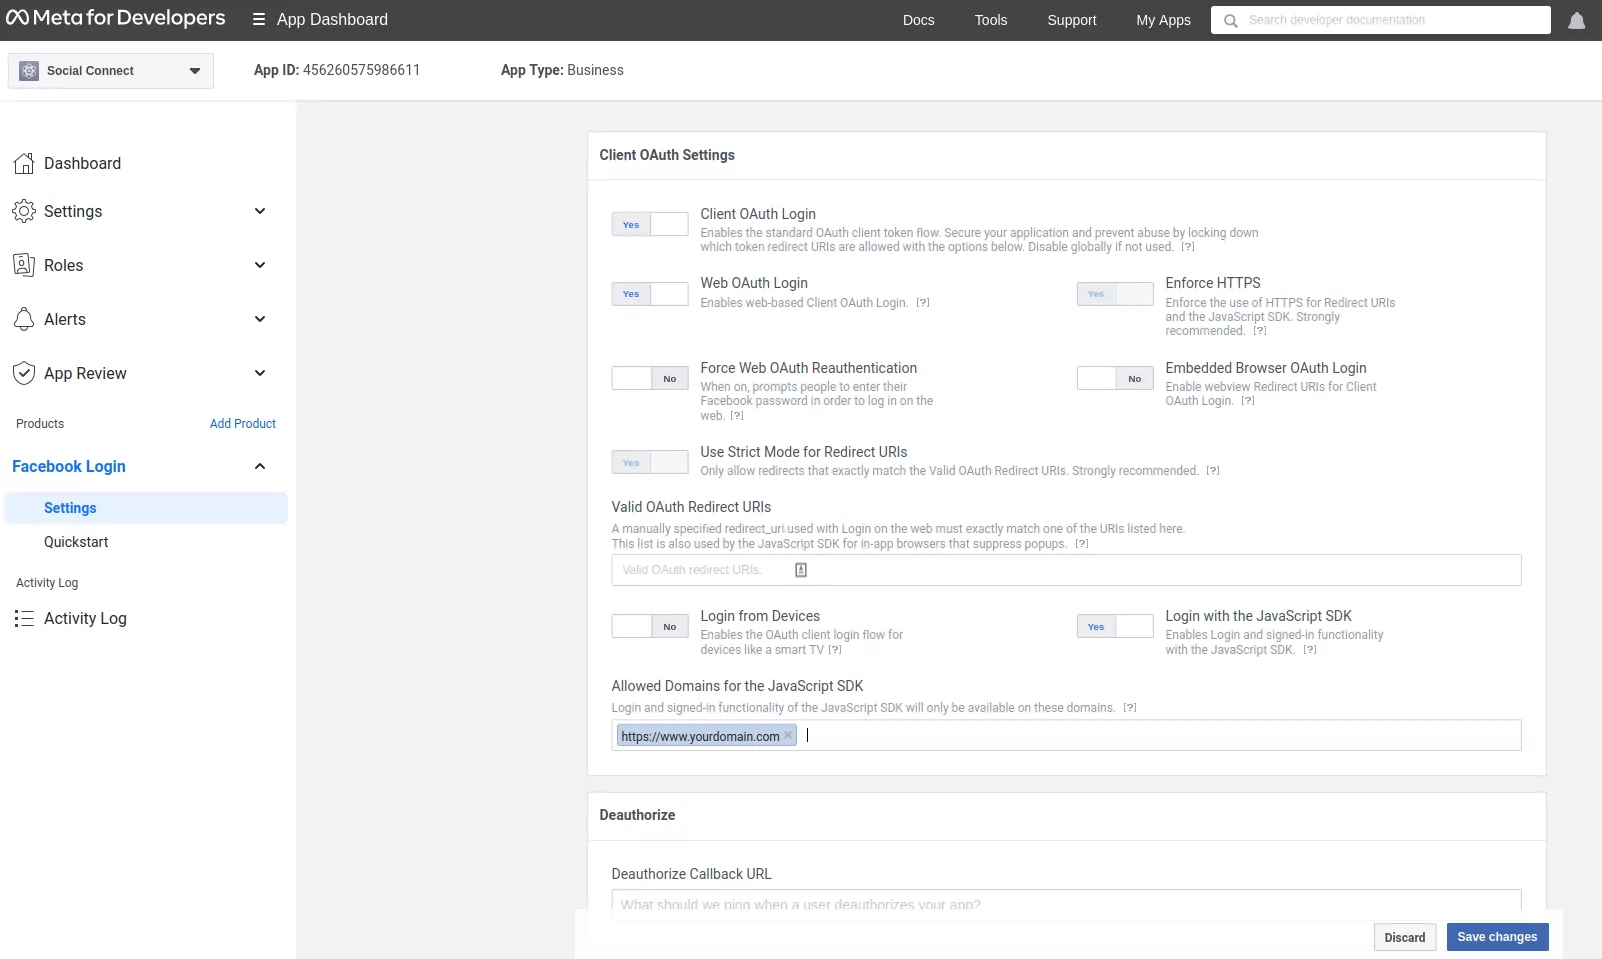
Go to Facebook Login -> Settings-> enable “Login with the JavaScript SDK” and add the site URL at “Allowed Domains for the JavaScript SDK”.

Now go to Dashboard, displayed on the left side, and copy your App ID.
After you copy the Facebook App ID go to your website -> Dashboard -> Profile Builder -> Social Connect -> Enable Facebook Login and paste your Facebook App ID. Scroll to the bottom to Save.
Social Login with Facebook should be available on WordPress Default and Profile Builder forms.
Create beautiful front-end registration and profile forms with custom fields. Setup member directories, custom redirects, cutomize user emails & more using the all in one user management plugin.
Get Profile BuilderCombine the power of Profile Builder with Paid Member Subscriptions to set up user registration, memberships, and recurring revenue.
Get 25% off with the bundle