Table of Contents
Getting people to register for your website can be hard, but with Multi-Step Registration Forms you can change those unpleasant forms into user-friendly ones.
There are a few recommended steps you can follow in order to build a more user-friendly form:
- build value around your registration form
- eliminate unnecessary fields
- group fields in a logical way and build registration processes
- secure your forms and the privacy of future users
- properly identify and explain errors
When to use Multi-Step Forms
Usually, for businesses, it can be hard to convince people to go to the registration page and complete a long and annoying form.
That’s why when you are dealing with this type of long forms it’s better to break them into multiple steps or pages based on the type of information that’s required.
There’s a high chance this will increase your forms conversion rate.
You can use Multi-Step Registration Forms in various cases and combinations, such as moments when you want to:
- divide registration by the topic of the information (tabs)
- split questions in two types (easy and hard)
- separate questions by a certain number of pages (pagination)
- divide by both pagination and tabs
Keeping all the above in mind, we started working on Multi-Step Forms, an add-on developed for our Profile Builder plugin. The add-on gives users the possibility to build multiple step forms, personalized and in a user-friendly way.
Now, to get this add-on up and running, you have to follow some steps, which includes Profile Builder installation and add-on activation.
How to install Multi-Step Form into your website
To make the Multi-Step Forms Add-on work, you will have to install the latest version of Profile Builder (version 2.5.1) because the add-on is not compatible with previous versions of our plugin.
When your download is complete, you can upload the .zip file in the Add Plugin page of the WordPress Dashboard. After that, navigate back to the Plugins Page and activate the Multi-Step Forms Add-on.
How to build Multi-Step Registration Forms with Profile Builder
Let’s suppose you are a B2B company that offers several creative and digital services, and you want your clients, which means other companies to register to your website, to complete information about themselves and build employee profiles.
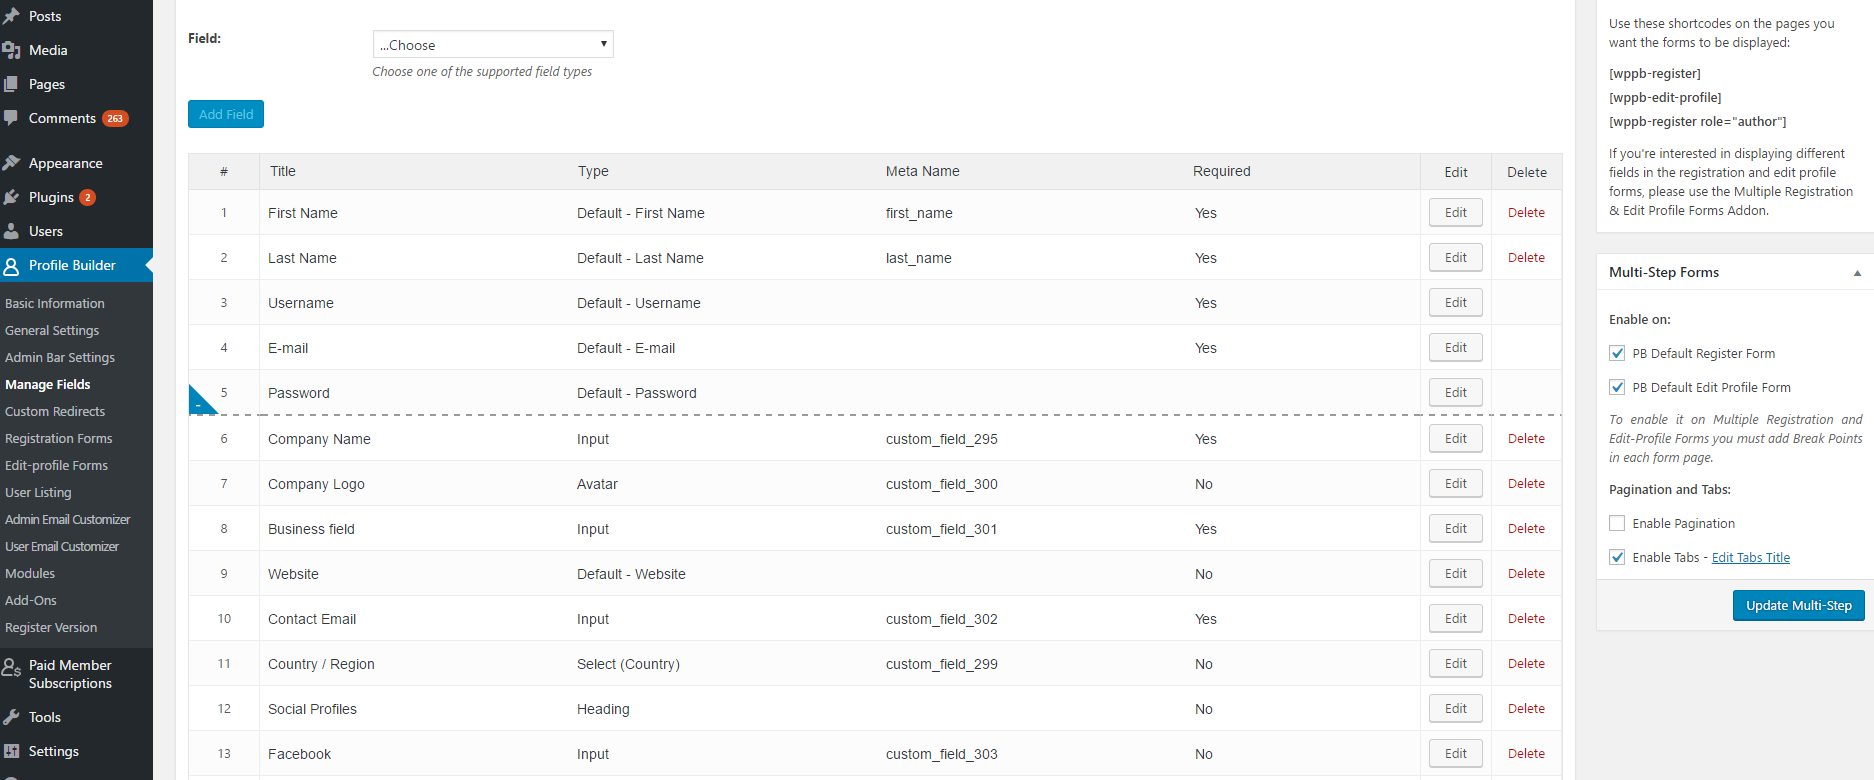
Therefore, we will create the form back to the back-end interface by adding custom fields. Into the Manage Fields Tab in Profile Builder Dashboard, you will find your Fields List with Field Proprieties for Registration and Edit Profile pages. There you can add a form BreakPoint, which means that your fields will be displayed in divided pages.
Into the Manage Fields Tab in Profile Builder Dashboard, you will find your Fields List with Field Proprieties for Registration and Edit Profile pages. There you can add a form BreakPoint, which means that your fields will be displayed in divided pages.
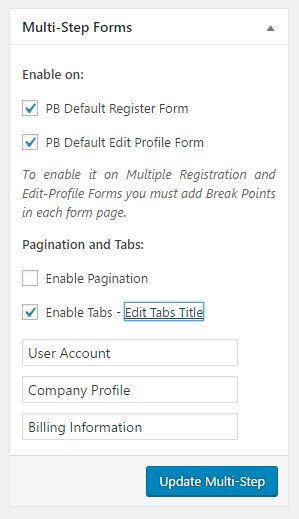
Further, you have another section for Multi-Step Forms where you can enable where to display your forms, which means Profile Builder Default Registration Form or Edit Profile Form. Also, from there you can set up which settings to be displayed: pagination or tabs.
In the example from above, we choose, only selected “Enable Tabs” as we want to display the fields based on some categories. The name of the tabs can be edited from “Edit Tabs Title”, and they will start showing up at the moment when you will add a BreakPoint.
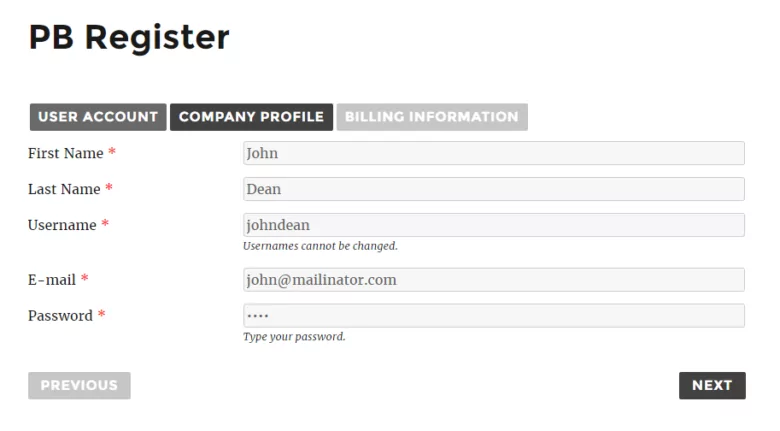
First, the representant of the company will fill in details about themselves, such as Name, Username, E-mail and Password.
In the Registration Form, your users will navigate to the next page, only when they will complete all the details required in the selected one.
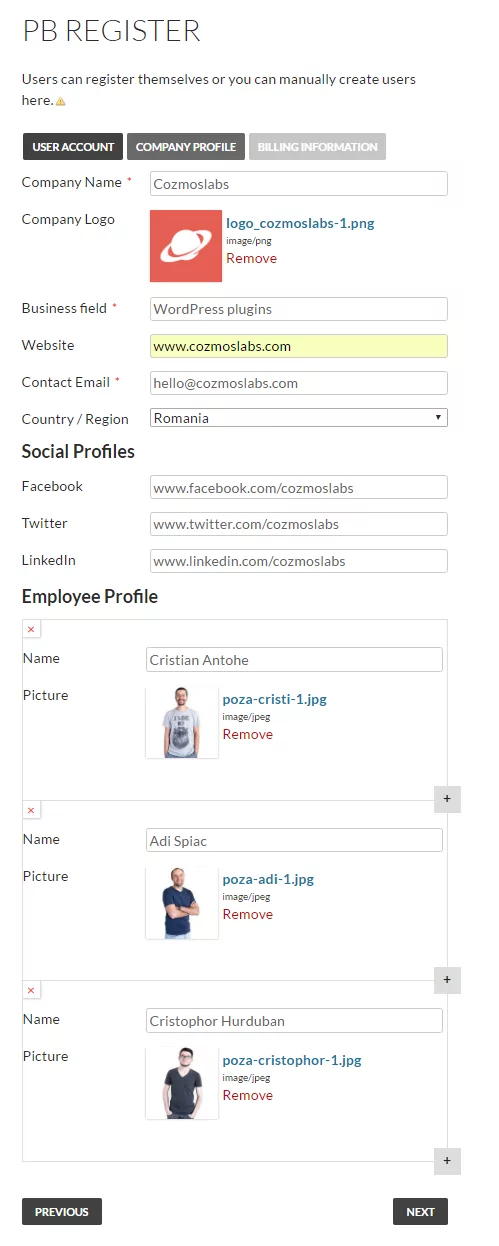
Below, we used Cozmoslabs as an example to fill in the form with information about company profile and created employee profiles for three of our team members.
If some details are required and others not, then your users will be able to access the next page without completing those fields. Above, we added a “Social Profiles” fields, with non-required fields, where a user can add links to the business social profiles.
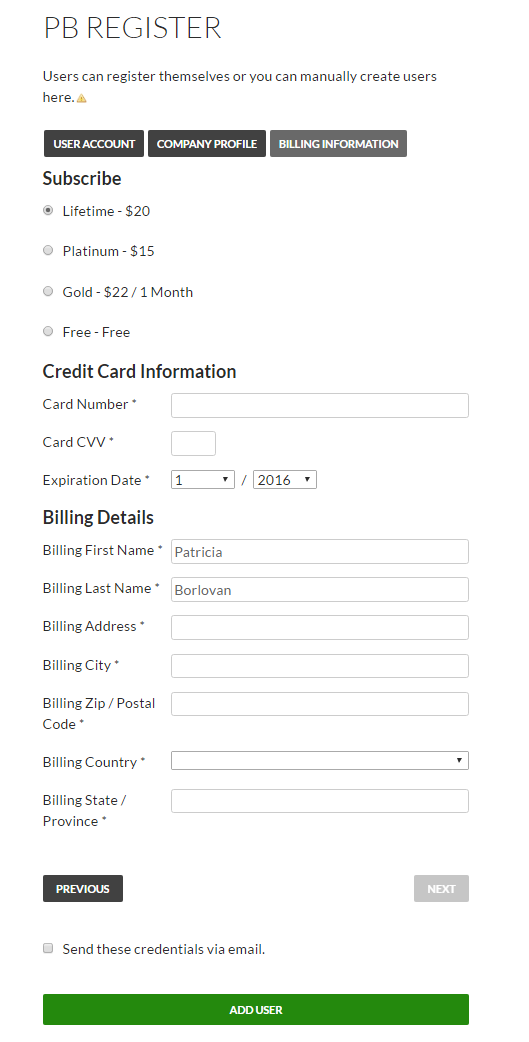
In the next step, the user will have to choose a subscription plan and complete billing information about the company.
Personalized style can be added for Tabs, Pagination and Next / Previous buttons using their specific CSS class.
This is it, you can now create Multi-Step Registration Forms and customize them in a user-friendly way so that your users will be guided all along the way.
Conclusions
Now, to sum up why you should consider using Multi-Step Registration Forms, let’s make a list:
- your audience can easily scan your content and that will keep them focused
- it increases engagement with form and also might boost your conversion rate
- it presents the questions in a logical and grouped way
- it doesn’t scare users with long content
Get Profile Builder – Multi-Step Forms Add-on
Related Articles
How to Create a WordPress Multi-Step Form (Fast and Easy, No Coding)
In your travels in the beautiful world of the web, you'll have no doubt seen a WordPress multi-step form. WordPress multi-step forms are all the rage these days, and they ensure a smooth registration process for membership sites. Why? They're easy to fill in from a user perspective. Visitors want an easy life, and they don't […]
Continue Reading
Top 10 Gravity Forms Alternatives You Need to Consider in 2025 (Free & Paid)
In the market for Gravity Forms alternatives? I think you will agree that finding the best online form builder is a bit tricky, especially with the many options out there. One such option is Gravity Forms, a well-known form builder in the game. But even with all the rave reviews, is it the best software […]
Continue Reading
How To Customize WooCommerce Registration Form (2025 Ultimate Guide)
Customizing the WooCommerce registration form in WordPress is something you should consider doing if you want to get more from your WooCommerce store and from the customer registration process. However, the WooCommerce plugin only allows you to collect basic information about your new users. If you customize it using Profile Builder Pro, you can collect […]
Continue Reading

