
Table of Contents
WordPress Custom Post Types are the best way to create intuitive content types. This is done by having a clear differentiation between the different types of content, adding just the required parameters and fields to them, and therefore removing clusters from the sometimes overloaded WordPress admin menu.
Out of the box, the WordPress content management system comes with a number of default post types for website owners to use. Each is formatted in their own way and has specific settings, page attributes, and options related only to that particular post type. So, when you create a new post it has those specific settings and options available for you to fill out.
And, though adding new custom post types manually is possible, it requires coding knowledge that the average WordPress user simply does not possess.
Today I am going to explain to you the importance of custom post types, why you should consider implementing them on your website, and how to create new posts in just a couple of clicks, without writing a single line of code, using a free WordPress plugin called WCK.
What Are Custom Post Types?
Before getting into what a custom post type is, I think it is important to have a general understanding of WordPress’s standard content types. These are the post types that come bundled in the WordPress core for everyone who uses WordPress sites.
Default Content Types
By default WordPress provides users a handful of built-in content types and post formats: Post, Page, Attachment, Revision, and Navigation Menu. These are great for blogging.
Each of the content types in WordPress has its own set of parameters such as:
- User access level.
- Ability to receive comments.
- Metadata.
- Templates used for display.
- Display rules.
- Taxonomies.
These properties define how each content type will display to website visitors, if at all, and how they will function either in the back or front end of your website.
The content types you are probably most familiar with are Pages and Posts. You can easily access each of these content types via your WordPress dashboard.
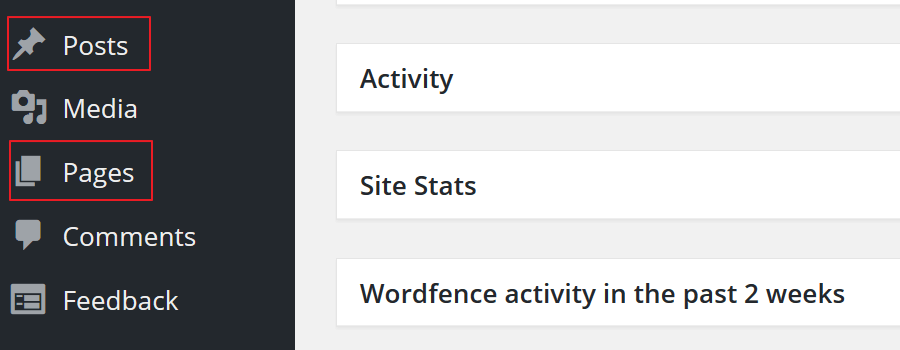
Pages are generally for constant content that rarely changes, such as About Me and Contact pages. Posts are usually left for dynamic content such as blog posts.
Custom Post Types
Custom post types are post types created specifically by you that are in addition to the built-in post types WordPress comes packaged with.
They appear in your WordPress database with different values than the standard post types do and will function according to how you define them. Custom post types have their own permalink structure. You can modify the permalink structure of single posts in your custom post type by heading over to Settings > Permalinks > Permalink Settings for Custom Post Types section from the WordPress admin panel.
Why Use Custom Post Types?
There are many reasons why you might consider using a custom post type on your website. One of the main reasons to utilize custom post types is to keep a specific type of content you want to share with your readers separate from the static pages and regular posts you publish.
By creating a custom post type your readers will be able to distinguish between the different content types on your website easily and navigate to their preferred content quickly.
Also, by personalizing the “Add New” post type interface, you’ll make it super easy for people who manage the site to add new content of the defined types. One of the easiest ways to do this is by adding custom fields and tying them to a particular post type.
Here are some ideas of different content types you may want to add to your website:
- Products for an eCommerce website.
- Testimonials for a web portfolio.
- Listings for a real estate agent website.
- Reviews for a publishing website.
- Events for an event website.
- Vehicle Listings for an automotive website.
As you can see these content types would have a very different type of message for your readers than what is typically provided in a Page or Post. Also, they will probably be displayed in the front-end in a different manner. By defining a custom post type with only the required fields and parameters you’ll simplify the front-end display and create more intuitive content adding interfaces.
Also, some page builders (like Elementor) will allow you to visually edit and style them.
This is why the idea of custom post types is so appealing to complex websites offering multiple types of information to site visitors.
Create a Custom Post Type Using WordPress Creation Kit (WCK)
There are tons of custom post type plugins out there e.g. Custom Post Type UI. However, today I am going to share with a great free plugin that can be used to create custom post types on your WordPress website rather than doing it manually, which can be difficult and requires coding experience. The best part is that it will work on your site regardless of which WordPress theme you’re using!
WCK consists of three helpful tools for creating custom post types, custom taxonomies, and custom fields and meta boxes for your posts and pages:
- WCK Custom Post Type Creator. Create custom post types by setting the appropriate register_post_type() function. As the name suggests, the register_post_type function is used to register a new post type in WordPress.
- WCK Taxonomy Creator. Create and edit custom taxonomies to correlate with your custom post types.
- WCK Custom Fields Creator. Create custom meta boxes with custom fields for posts, pages, and custom post types.
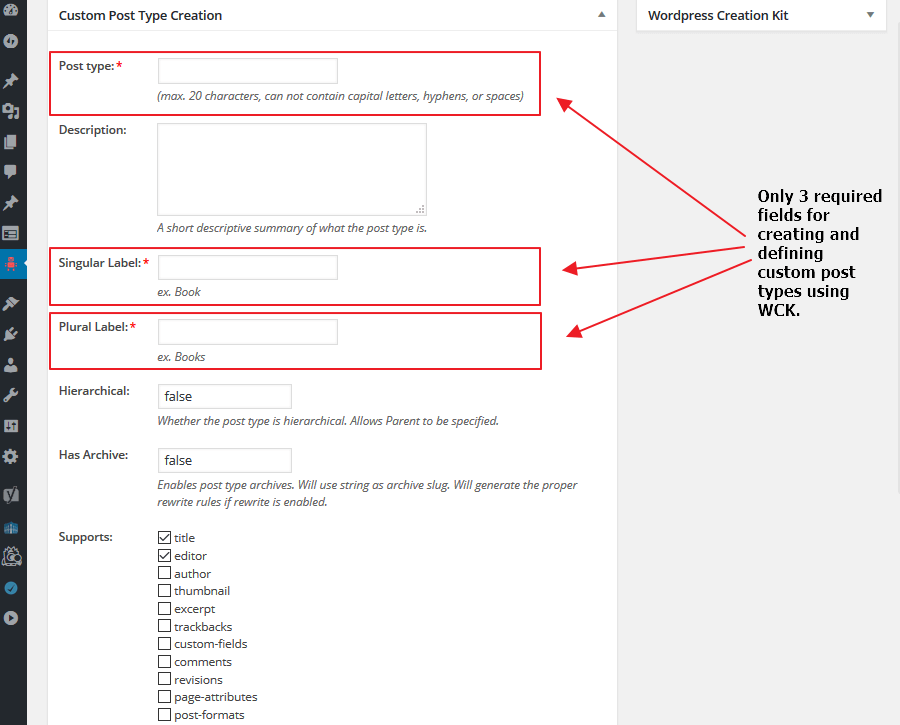
With WCK, website owners are able to easily create new custom post types for their websites directly from the WordPress admin area by defining only three required parameters.
This basic user interface for creating and defining custom post types is easy to manage, it all requires just a couple of clicks.
Step 1: Installation and Activation
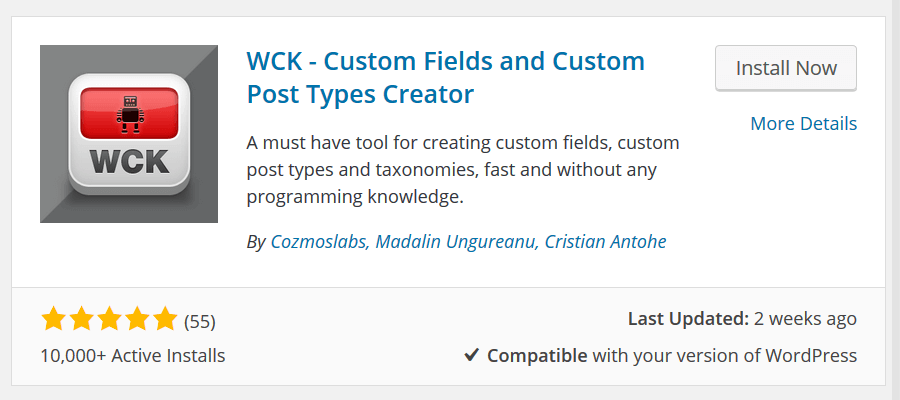
To install WCK onto your WordPress website simply navigate to Plugins > Add New in your WordPress dashboard. Then search for “WCK”.
Next select Install Now and activate the plugin.
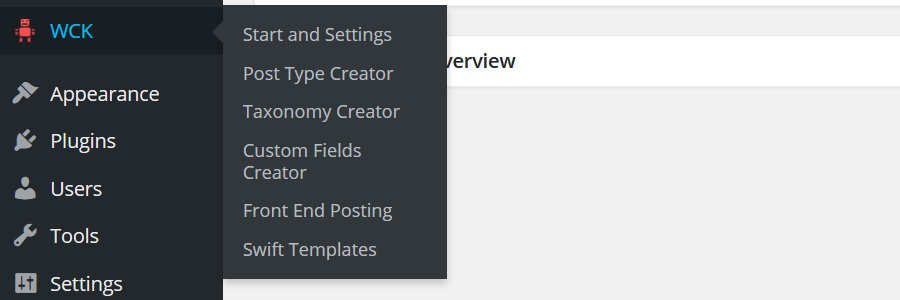
Once installed, you will notice a new WordPress dashboard menu item labeled WCK has been created.
Here you will find menu items labeled:
- Start and Settings
- Post Type Creator
- Taxonomy Creator
- Custom Fields Creator
- Front End Posting
- Swift Templates
For the purposes of today’s post, we will focus on the Post Type Creator menu item for creating custom post types. If you wish to extend your CPTs by adding custom fields, look into Custom Fields Creator as well.
Step 2: Create a Custom Post Type
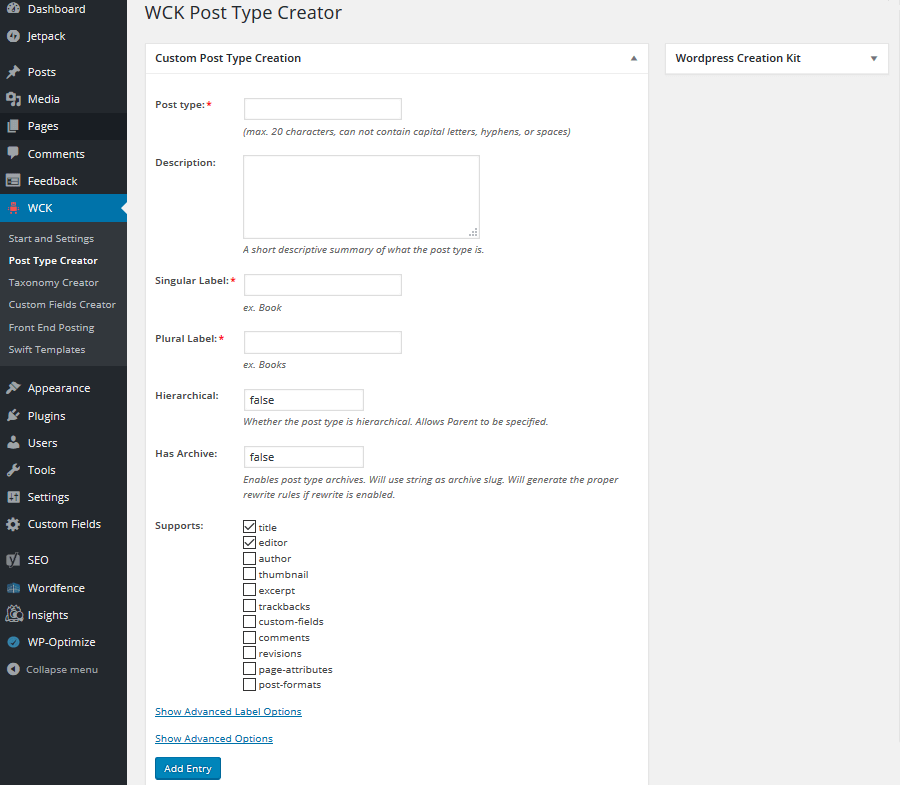
To create a new custom post type for your website navigate to WCK > Post Type Creator in your WordPress dashboard.
This will bring you to a screen where your creation can begin.
There are several areas for you to fill in regarding your custom post type:
- Post type. Label the type of custom post type you are creating.
- Description. Provide a short description regarding your new custom post type.
- Singular Label. Designate a singular name for your custom post type’s single post.
- Plural Label. Designate a plural label for your custom post type.
- Hierarchical. This decides whether the custom post type you are creating will allow a Parent to be specified.
- Has Archive. This enables post type archives.
- Supports. Click on the selections you would like your custom post type to support: title, editor, author, thumbnail, and more.
There are also several advanced options you can configure if you so choose, however, WCK will work just fine regardless.
After you have filled in the appropriate information select Add Entry.
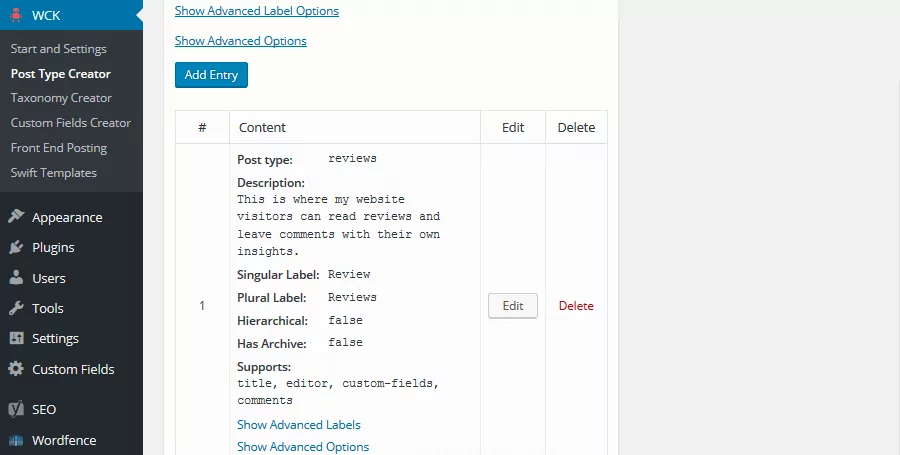
You will notice after selecting Add Entry that near the bottom of the screen your new custom post type will be displayed with the information you plugged in.
You also have the option to edit or delete this entry if you so choose.
Step 3: Use Your New Custom Post Type
Now that you have easily created a new custom post type for your WordPress website, it is time to make use of it.
Check out your WordPress dashboard menu items and look for your new custom post type. For today’s explanation, I created a custom post type labeled Reviews.
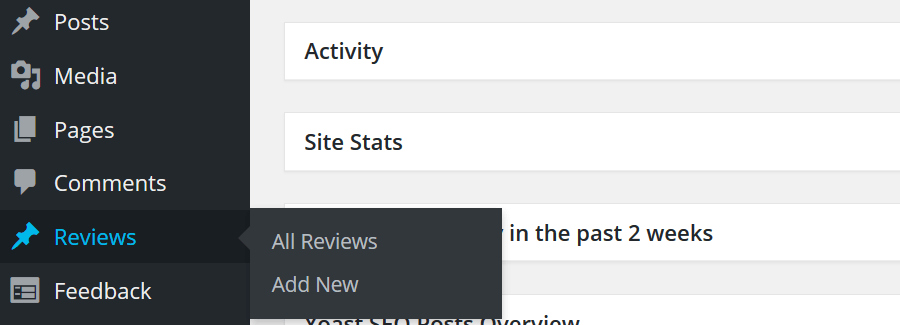
When I search items in my WordPress dashboard I now see this:
Notice that in addition to my built-in content types, Pages and Posts, I now have a new custom post type in my WordPress dashboard labeled Reviews. From there I can view all reviews I have created or create a new Review. In the Edit Post screen it will have the page attributes and options we selected above.
Swift Templates
Although the focus of this post today is on creating custom post types, it is worth mentioning that WCK also comes with a handy tool for creating front end templates with zero programming knowledge or experience in the Pro version of the plugin. It makes it easy to create custom content types in WordPress.
Template files control how your website will display to your visitors. They draw information from your WordPress MySQL database and generate the HTML code needed for delivery to your site visitor’s browser. This is how your readers are able to see your site’s content as a whole.
Using the Swift Templates tool located in the WCK WordPress dashboard menu, you can do things such as create listings of all of your custom post types and create single page templates that consider previously made custom post types, all without the writing any PHP or messing with any of your website’s template files.
Final Thoughts
Creating custom post types for your WordPress website is a great way to add new content types for your readers to enjoy.
Also, if you have multiple authors that help you with content creation, you can quickly create custom, yet familiar, data entry interfaces. The authors will be able to fill out the custom fields you define, of the types you define. Then easily create templates to render the items on the front end in a format you completely control.
By using a custom post type plugin, you don’t have to worry about messing around with complex WordPress code like add_action functions or wp_query, or adding to your site’s functions.php file. You can create a new post type for your WordPress website in no time!
Have you considered adding your own custom post types to your website? Please let us know in the comment section below.
Try WCK on an easy to use Demo Site.
Related Articles
Show Custom Fields in WordPress
Adding custom fields to your WordPress site helps you display additional information about your content and can improve SEO for Google and other search engines. But how to show custom fields can be a pretty challenging thing to achieve by non-technical users By default, WordPress gives you the possibility to add custom fields (sometimes called […]
Continue ReadingWordPress Creation Kit – a sparkling new custom field, taxonomy and post type creator
WordPress Creation Kit consists of three brand new modules that can help you with the tough task of creating and maintaining custom post types, custom taxonomies and most importantly, custom fields and metaboxes for your posts, pages or CPT's. Why another plugin for this? We've actually started working on this more then a year ago, […]
Continue Reading
How to Create a Custom Login Page for WordPress
Depending on the type of WordPress site you run, there are several reasons why you might want to create a custom login page for WordPress. And, you can easily do so by using a dedicated plugin. Using a customized login form can help you minimize hacking risks and related security issues as well as improve […]
Continue Reading

Hi, thank you so much building such a great plugin.
I’m using Custom Fields Creator, but I’m facing problems while importing data.
When I export my content via CSV, I get one column for each field, plus the serialized column for each metabox.
If I add new content or update existing content by modifying the columns related to the fields, the values doesnt show up on the form.
1) Is there any way of discosidering the serialized fields?
or
2) Can I “refresh” the serialized fields so that they update to reflect changes in the individual fields?
thanks in advance!
alan
Hi Alan,
Unfortunately that’s a limitation at this point and we’re quite aware of it.
We’re also working in migration from serialized fields to a flat structure so there are no longer two types of storage, meaning in a future update we should have flat fields only, no more serialized fields.
I wish I had at least some sort of solution, however, until we change the data structure there’s nothing we can do besides custom code to get info from individual fields to the serialized 🙁