
Table of Contents
- 1 Reasons for Creating a WordPress Registration Form with Payment
- 2 How to Create a WordPress Registration Form with Payment Options (In 4 Steps)
- 3 Making a WordPress Registration Form with Payment Is a Breeze
Creating a WordPress registration form with payment options can be quite intimidating, even for a developer. You’ll need to make sure that all transactions are processed properly and safely. A glitchy or suspicious payment system can discourage people from signing up.
WordPress makes it surprisingly easy to create registration forms with different payment methods. For instance, you can enable people to pay via popular gateways like Stripe and PayPal, as well as other options.
In this post, we’ll look at some reasons why you may want to add payment options to your registration forms. Then, we’ll show you how to do it. Let’s dive right in!
Reasons for Creating a WordPress Registration Form with Payment
If you’re reading this, you likely already have a reason you want to create a WordPress registration form with payment. Or, you’re not sure if you should.
Here are some of the most common reasons people want to create a WordPress registration form with payment options:
- For simple services like a paid weekly or monthly newsletter, the best option is to create a simple registration form that allows you to accept payments.
- If you’re a local business offering a particular service and want to accept advance payments from your customers, a registration form with payment is going to be your best bet.
- You don’t need to go for a WooCommerce form with payment if you just want to sell a single digital product – you can create a registration form with payment in WordPress itself.
- If you’re selling your expertise in the form of consultations, a payments-integrated registration form would ensure the best conversion rate for your business.
Of course, there can be many other reasons for creating a WordPress registration form with PayPal, Stripe, or other payment methods. But essentially, if you want people to pay upon registration, then you’ll need to learn how to set up these payment methods.
How to Create a WordPress Registration Form with Payment Options (In 4 Steps)
As you probably already know, there are thousands of WordPress plugins. You have a plugin for pretty much every feature you want to add to your WordPress website. Plugins help you add functionality to your site without having to touch the code.
There are even plugins for creating registration forms and accepting payments. The plugin we recommend is one that lets you do both – create a registration form as well as accept payments using different methods. In other words, it’s a WordPress registration form with payment plugin that covers everything you need for the task.
Paid Member Subscriptions lets you create a registration form with payment in just a few clicks:
Paid Member Subscriptions Pro
Accept (recurring) payments, create subscription plans and restrict content on your website. Easily setup a WordPress membership site using Paid Member Subscriptions.
Get Paid Member SubscriptionsThis plugin is primarily designed for membership sites. So, should you decide to convert your simple WordPress service or business into a full-scale membership business, you won’t have to look for any other solution.
With Paid Member Subscriptions, you can also do the following things:
- Create a login page and a custom password reset page.
- Hide a category in WooCommerce to allow only registered users or subscribers to access it.
- Create a WooCommerce form with payment for single-product stores.
- Create different subscription plans for different types of users.
- Use it as a basic WooCommerce My Accounts customization plugin.
- Restrict access to premium content and products, and add discounted pricing to increase conversions.
- Send email reminders to complete purchases.
- Add Pay-What-You-Want pricing to give your users the freedom of paying whatever they feel is the real value of your offering.
There are tons of other functionalities. As mentioned above, it’s a complete WordPress and WooCommerce membership plugin.
That said, you can also use it to create simple registration forms with different payment options for both WordPress and WooCommerce sites. Let’s show you how.
1. Install Paid Member Subscriptions
If you don’t want a custom registration form, you can use Paid Member Subscriptions to create a basic but functional registration form. If you’re looking for a fully customized registration form, you can check out the optional step in the next section.
First, go ahead and install the plugin on your WordPress site. Click on the Plugins → Add New Plugin and type ‘Paid Member Subscriptions’ into the search bar:
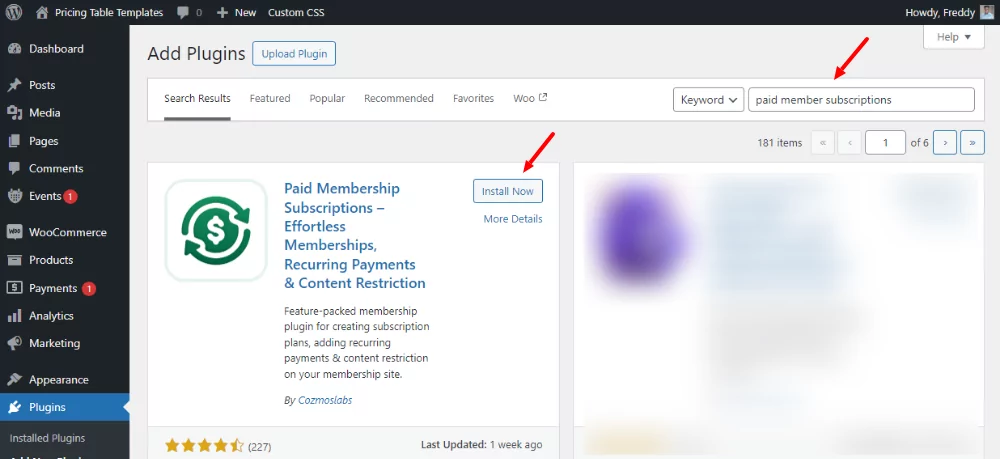
Then, click on the Install Now button, followed by Activate.
2. Create a Registration Page
After installing the plugin, you should see a new Paid Member Subscriptions tab in the dashboard menu. Simply open your current registration page or create a new one.
Then, click to add a new block and search for your new PMS Register block:

Then, add it to the page. Here’s what the registration form may look like on the front end:
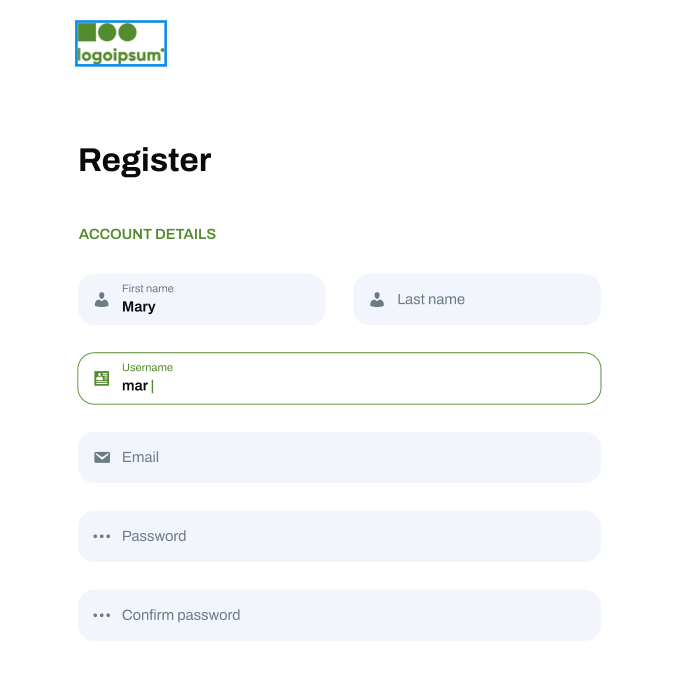
To add more fields, you can check out the section below.
If you prefer to work with shortcodes, go to Paid Member Subscriptions → Basic information. Here, you’ll find a list of shortcodes, including one for the registration form:
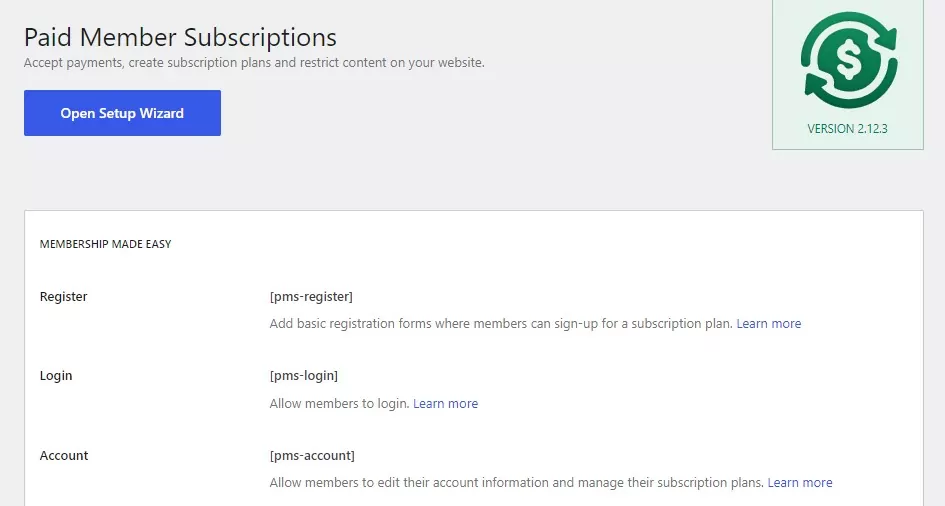
Copy the code for the registration form, which is [pms-register]. Then, open your registration page.
Here, add the Shortcode block and paste the code into the field provided:
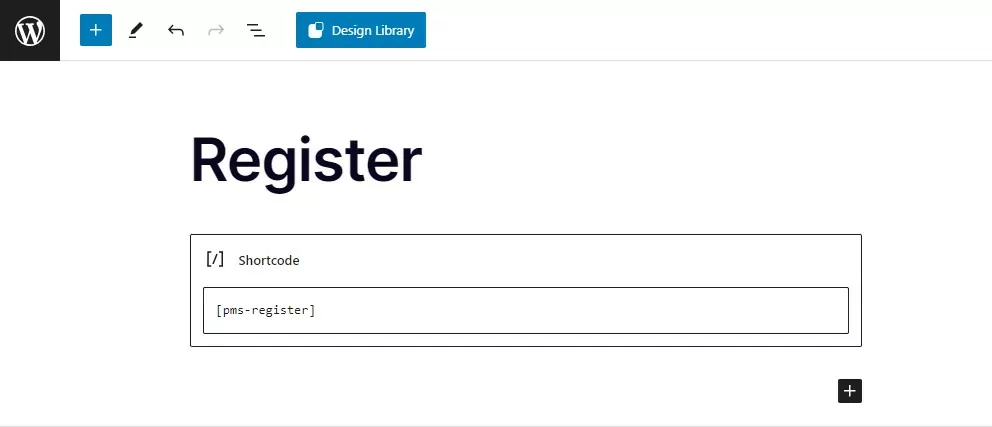
When you’re ready, simply publish your changes. Your registration page is now live!
Optional Step: Create a Customized Registration Form
Paid Member Subscriptions lets you create a registration form, but only a basic registration form. While it doesn’t offer much in terms of customization options, it does have a selection of form styles to choose from:
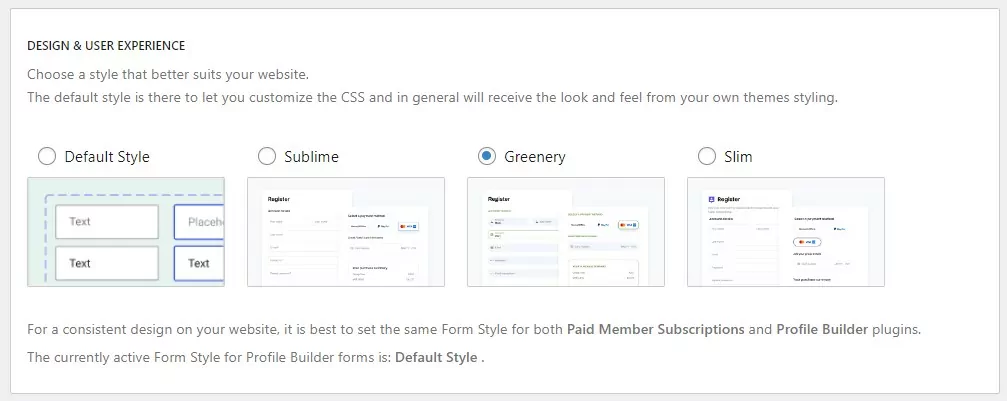
If you only want a basic WordPress registration form with payment, Paid Member Subscription will fit the bill. However, if you do want to make a lot of customizations to your registration form, you can use Profile Builder.
Profile Builder Pro
Create beautiful front-end registration and profile forms with custom fields. Setup member directories, custom redirects, cutomize user emails & more using the all in one user management plugin.
Get Profile BuilderProfile Builder is a complete user management plugin that lets you create customized registration, login, and other important user pages. It also enables you to create a member directory or a WordPress staff directory plugin.
You can follow our guide on how to create a custom WordPress registration form with Profile Builder to learn more.
3. Create a Subscription Plan
Now that we have our user registration page and form, the next step is to create a subscription plan. Once you have an active subscription plan, it will automatically show up on your registration form:
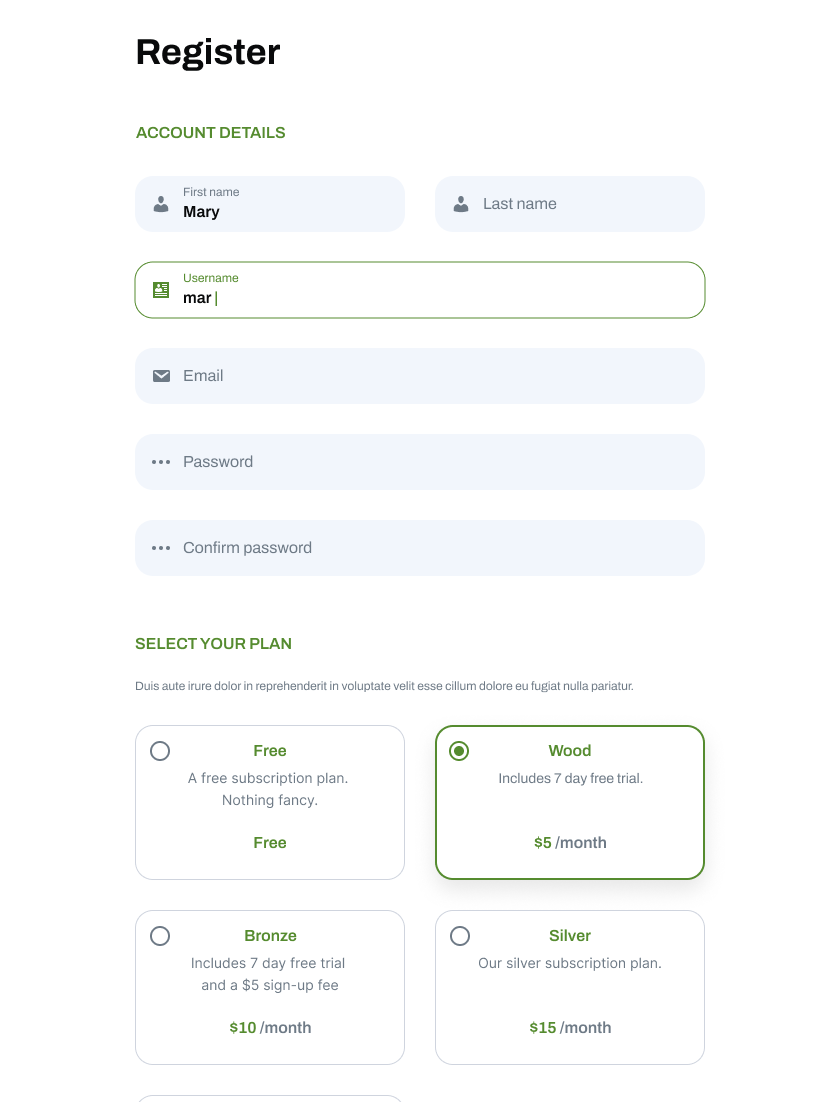
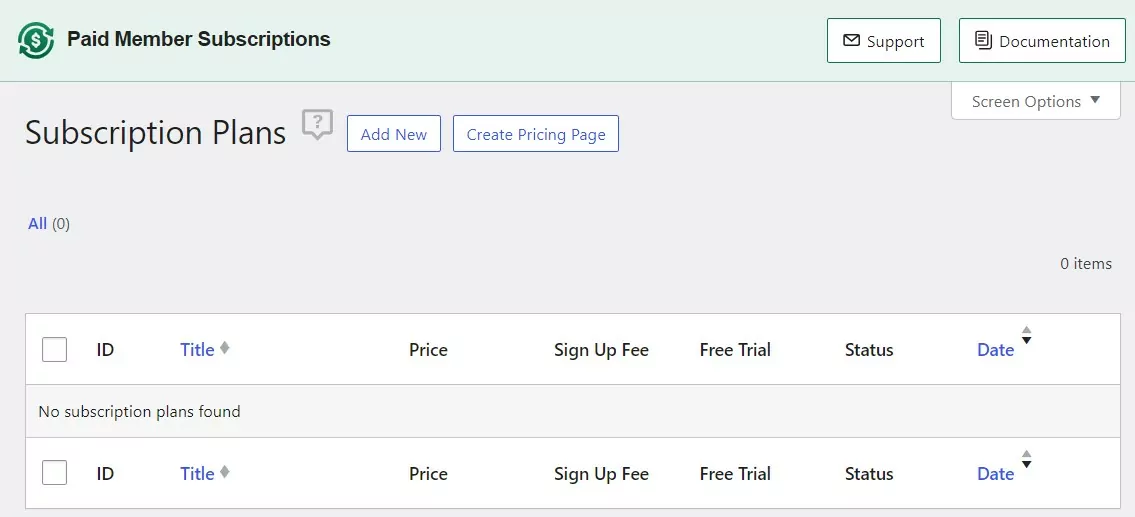
To do this, click on the Subscription Plans option under Paid Member Subscriptions. Then, click on the Add New button at the top of the page:
If you need help setting up your subscription plan, you can refer to our detailed documentation:
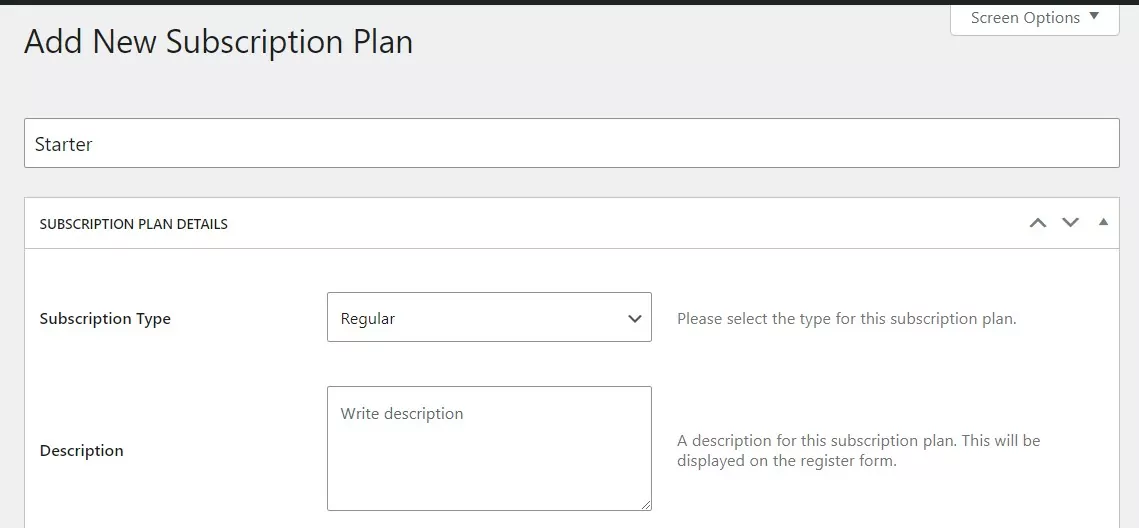
Once you have everything filled out, click on the Save Subscription button at the top-right of the page.
4. Add Payment Options to Your Registration Form
Now it’s finally time to add the payment options. Click on the Settings option under the Paid Member Subscriptions menu and go to the Payments tab.
Here, you’ll need to select the currency and configure some other settings:
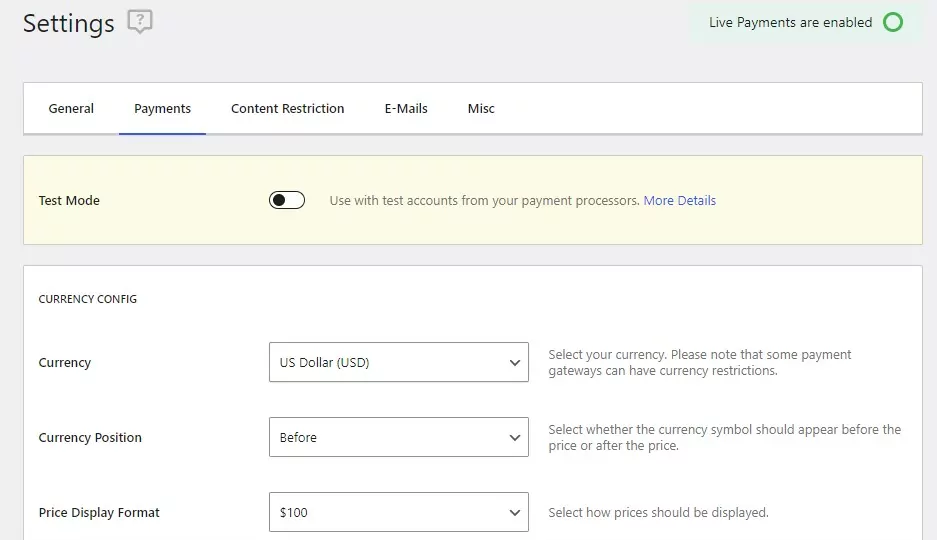
If you go to the Active Payment Gateways section you’ll see that you can enable two types of payments by default. These are Manual/Offline and PayPal Standard. If you have the Pro plugin, you’ll also see Stripe here:
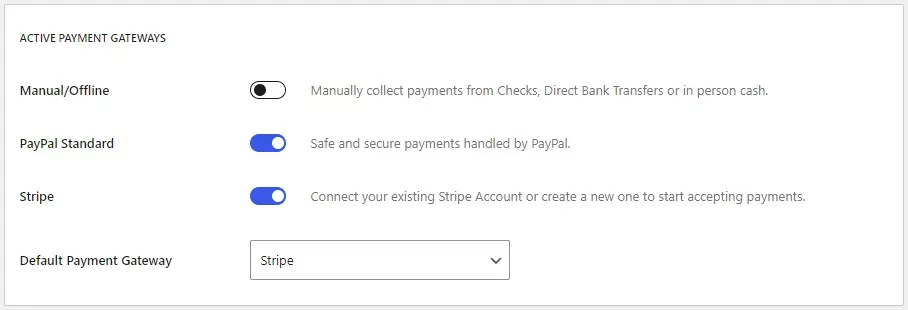
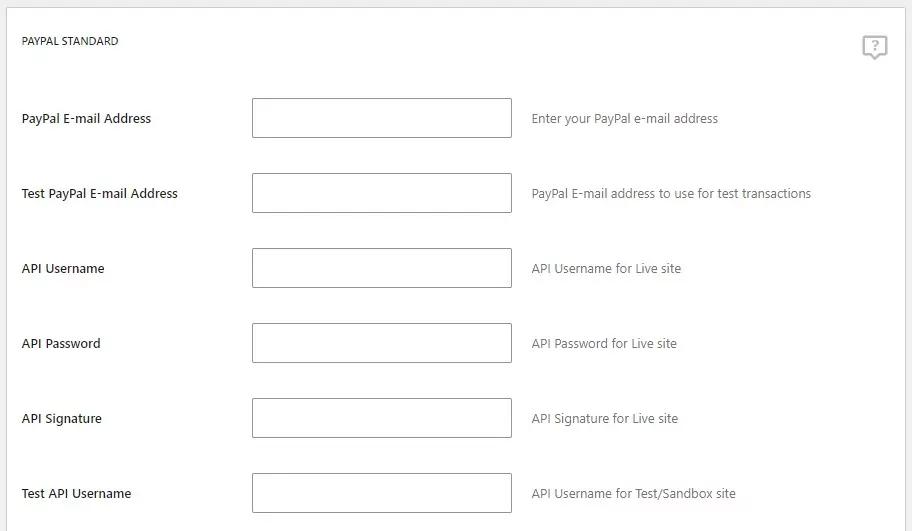
You can also choose a default payment gateway. Note that you’ll need to connect to your Stripe account. If you enable PayPal, you’ll also need to enter your PayPal email address, API, and other information:
When you’re ready, save your changes. Your registration form should now look something like this:
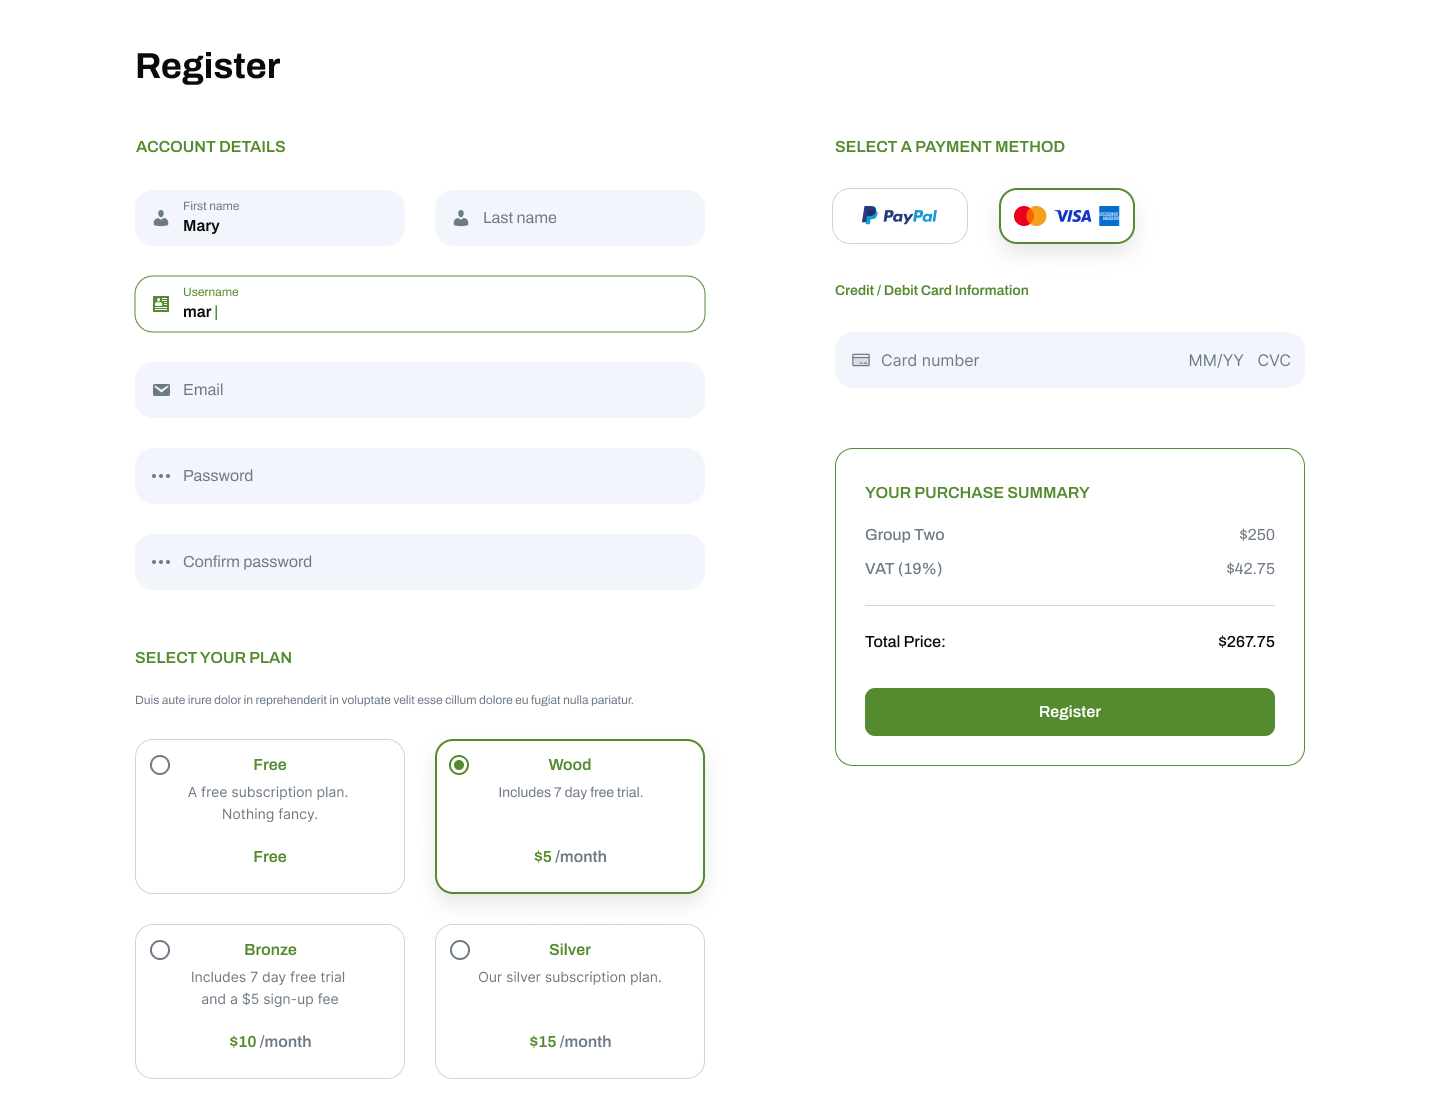
Note that Paid Member Subscriptions enables you to make some test transactions. This way, you can ensure that everything is working properly.
Using PayPal as a Payment Gateway
If you want to use PayPal Express, you’ll need the Paid Member Subscriptions Pro version.
Given all the advanced payments and subscription functionalities you will get, plus the enhanced customization options that will come with the pro version, this will likely be a great investment for your business.
Once you purchase Paid Member Subscriptions Pro, you can download it by logging into your account on Cozmoslabs:
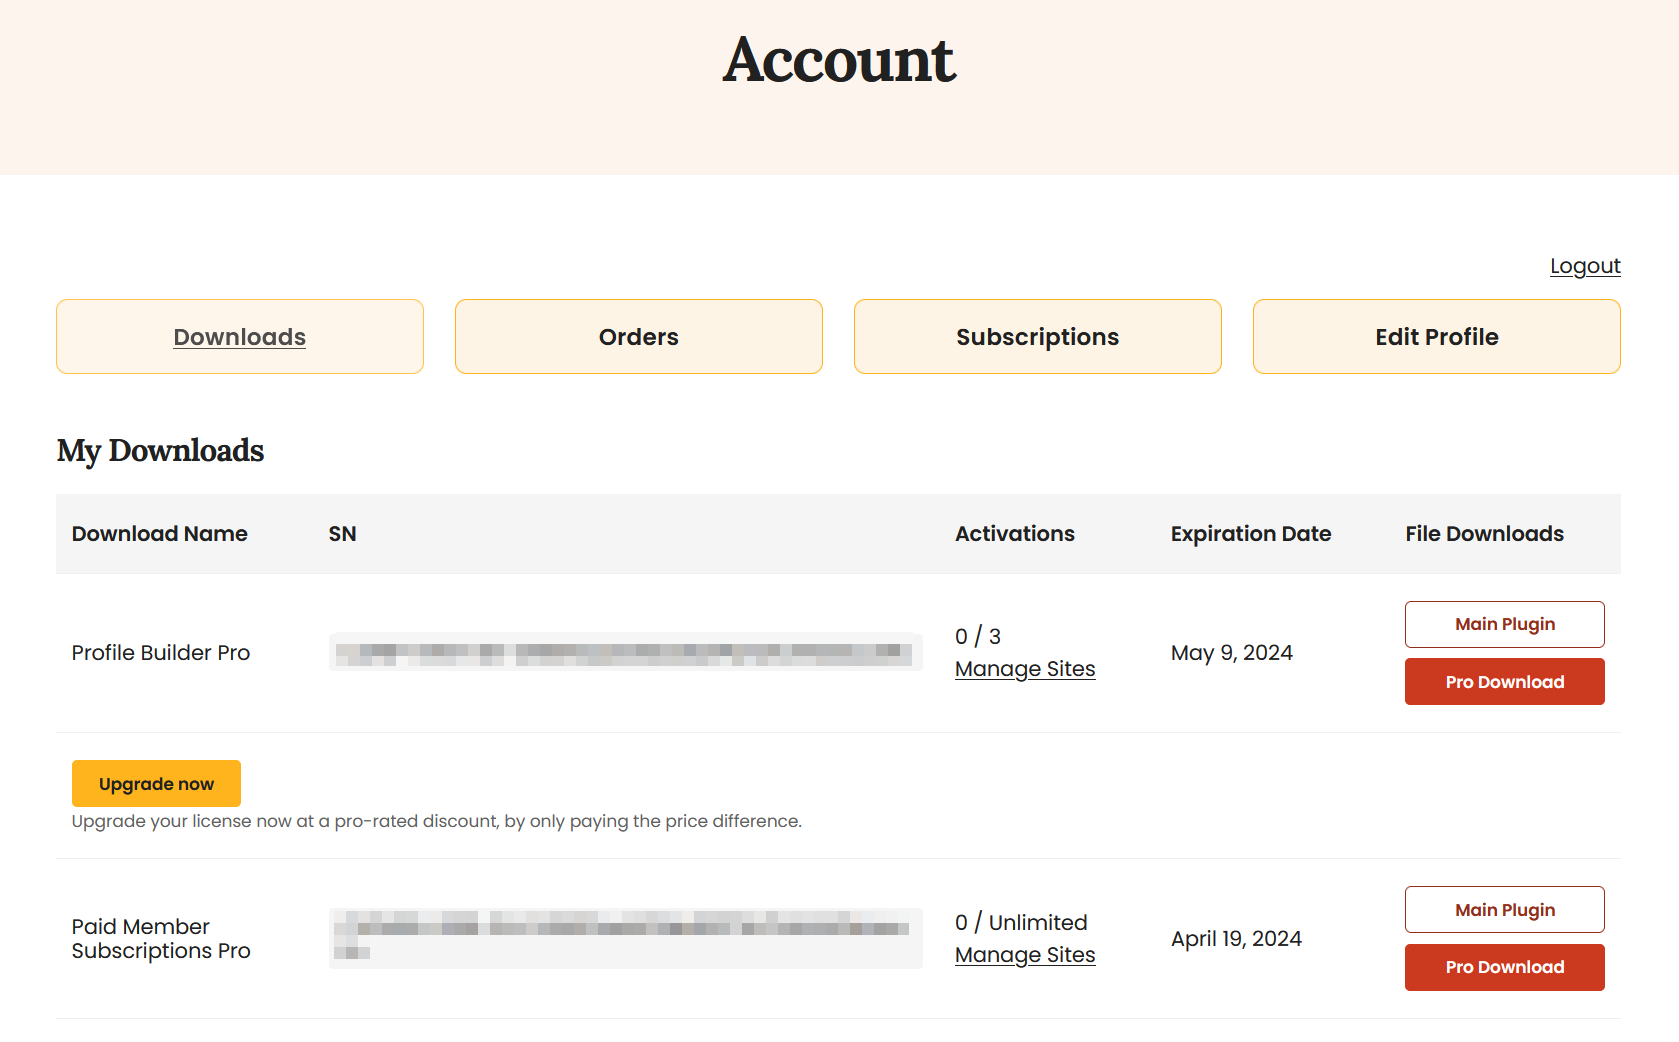
Now go back to your WordPress dashboard, click on Add New Plugin under the Plugins menu, and then the Upload Plugin button at the top.
Choose the Paid Member Subscriptions Pro plugin files and click on Install Now, followed by Activate.
Once the Paid Member Subscriptions Pro version is activated on your site, click on the Add-ons option under Paid Member Subscriptions menu.
Scroll down to the Pro Add-ons section, find the PayPal Express option and click on the Activate button:

Once this add-on is activated, you can add it as a payment gateway option by navigating to the Settings page. Click on the Payments tab again and you’ll find PayPal Express Checkout listed there:
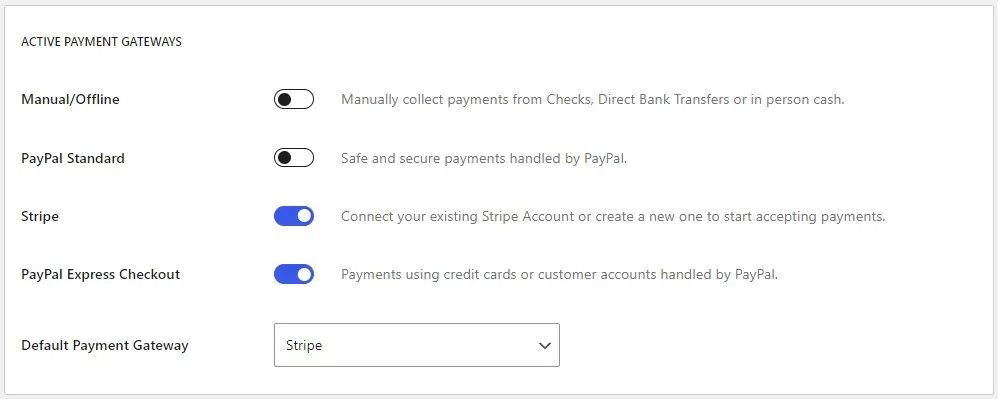
You can also change the default payment gateway to this newly added option. Note that you can only use PayPal Express or PayPal Standard as an active payment gateway on your site – you can’t have both options enabled.
Now scroll down a bit, enter your PayPal account details, and then click on the Save Settings button at the end of the page.
There’s also an add-on for Stripe with Paid Member Subscriptions Pro. You can follow the steps above to activate it.
Making a WordPress Registration Form with Payment Is a Breeze
Creating a WordPress registration form with PayPal or Stripe payment options is a breeze with Paid Member Subscriptions Pro. You’ll also find a lot of options to customize your subscription plan exactly to your needs.
Moreover, should you decide to turn your site into a complete membership website, you can easily do so using Paid Member Subscriptions Pro. You’ll be able to provide multiple subscription plans, set up recurring payments, and more.
Paid Member Subscriptions Pro
Easily create a registration form with multiple payment options, create customized subscription plans, turn your site into a membership site and do much more with PMS Pro.
Get Paid Member SubscriptionsDo you still have questions on how to create a registration form with payment options in WordPress? Let us know in the comments below!
Related Articles

5 Best WordPress Subscription Plugins for Membership + More
Searching for the best WordPress subscription plugins to set up recurring subscriptions on your site? Subscription payments are a great way to build recurring revenue and maximize your website's long-term income. Whether you're building a full membership site or you just want to create a WordPress subscription payment form, there are some great WordPress subscription […]
Continue Reading
How to Sell Group Memberships in WordPress using Paid Member Subscriptions
Selling group memberships on your WordPress site is a great way to increase revenue by making subscriptions purchase more convenient to certain customers. You don’t even need to completely reinvent the wheel if you already have a membership site of your own. In this post, we’re going to walk you through the process of using […]
Continue Reading
Best WooCommerce Subscriptions Alternative: Paid Member Subscriptions, a More Affordable and Complete Solution
Are you looking to sell subscription products on your WooCommerce site? One of the most popular ways to sell subscription products in WooCommerce is with the WooCommerce Subscriptions plugin. It lets you create WooCommerce products with recurring payments as a way to offer subscriptions to your customers. While this is an official extension from WooCommerce, […]
Continue Reading


