

Table of Contents
In 2022, Tinder was the most downloaded dating app with over 64 million downloads. But the popularity of these sites makes it difficult for people to find their perfect match. Therefore, you might be wondering how to create a dating site that delivers faster results.
For example, you could target a more specific audience and save users from trawling through millions of profiles until they find The One. Plus, a dating site is a great way to earn recurring revenue and build a thriving online community.
In this post, we’ll discuss the tools you need to get started. Then, we’ll show you how to create a dating site in six simple steps. Let’s dive in!
The Tools You’ll Need to Make a Dating Site
There are plenty of dating sites out there, including popular platforms like Tinder and eHarmony. But this means that hopeful singles who sign up to these platforms usually have to weed through tons of profiles before they find a suitable match.
Therefore, it can be a good idea to set up your own dating site. You might even target a niche audience like single parents. This can make your service stand out, and make it easier for people to find compatible profiles.
Better yet, a dating site can serve as the ideal platform to build a thriving community and generate passive income (which we’ll show you how to do later). First though, here are some tools you’ll need to set up your site.
WordPress
For starters, you’ll need a content management system (CMS) like WordPress to store all your important content pages, posts, images, forms, and more:
WordPress is a popular, free, open-source software, which makes it highly flexible and extendable. If you have the skills to configure a server, you can go ahead and install it yourself.
Alternatively, you can use a reliable web hosting service to set up your WordPress site for you. Many quality web hosts offer dedicated WordPress plans that ensure optimum speed and security.
Plus, you’ll find that some hosting providers offer free domain names when you sign up for a hosting package. Once you get your site set up, you’ll also need to install a WordPress theme to define a certain look and feel for your site.
Paid Member Subscriptions
It’s very easy to customize the default WordPress setup using plugins. This way, you can add new functionality to your site.
Paid Member Subscriptions enables you to set up multiple membership plans to generate revenue from your dating site:
Paid Member Subscriptions Pro
Accept (recurring) payments, create subscription plans and restrict content on your website. Easily setup a WordPress membership site using Paid Member Subscriptions.
Get Paid Member SubscriptionsThis way, you’ll earn a recurring monthly subscription from paying members, but you can also charge one-time registration fees. Better yet, you can combine this monetization method with other options like advertising and affiliate marketing.
There’s a free version of Paid Member Subscriptions, but the premium plugin gives you access to advanced features and add-ons. Regardless of what you choose, this plugin makes it simple to restrict access to relevant posts, pages, forums, and more.
Profile Builder
If you’re wondering how to create a dating site, you’ll need one final tool to get started.
Profile Builder is another powerful WordPress plugin that enables you to set up registration and login forms that look far more appealing than the default WordPress options:
Profile Builder Pro
Create beautiful front-end registration and profile forms with custom fields. Setup member directories, custom redirects, cutomize user emails & more using the all in one user management plugin.
Get Profile BuilderYou can add extra form fields to obtain the exact information that you require from users.
Additionally, you can let your users customize their accounts and profiles to their liking or even create beautiful user directories that display all site members using pre-designed templates. Again, there’s a free version available, but the premium plugin provides extra capabilities.
BuddyPress
Effectively, you’ll be creating a social network. This means you’ll need a tool that enables members to interact with one another.
BuddyPress is software that facilitates private messaging on WordPress membership sites. It also offers features such as activity streams, user groups, and more. You can download the free plugin for this tutorial.
How to Create a Dating Site (In 6 Steps)
Now that you’ve got everything set up, let’s take a look at how to create a dating site. Note that if you’re going to charge people to sign up to your site, you’ll need to enable payment gateways by going to Paid Member Subscriptions → Settings → Payments.
Step 1: Create a Custom Registration Form
First, you will want to set up a custom registration form to gain extra information about new members like age, occupation, and location. But you might also want to know what they’re looking for in a partner, or ask whether they have children.
Let’s create the registration page. Go to Profile Builder → Basic Information and click on Create Form Pages:
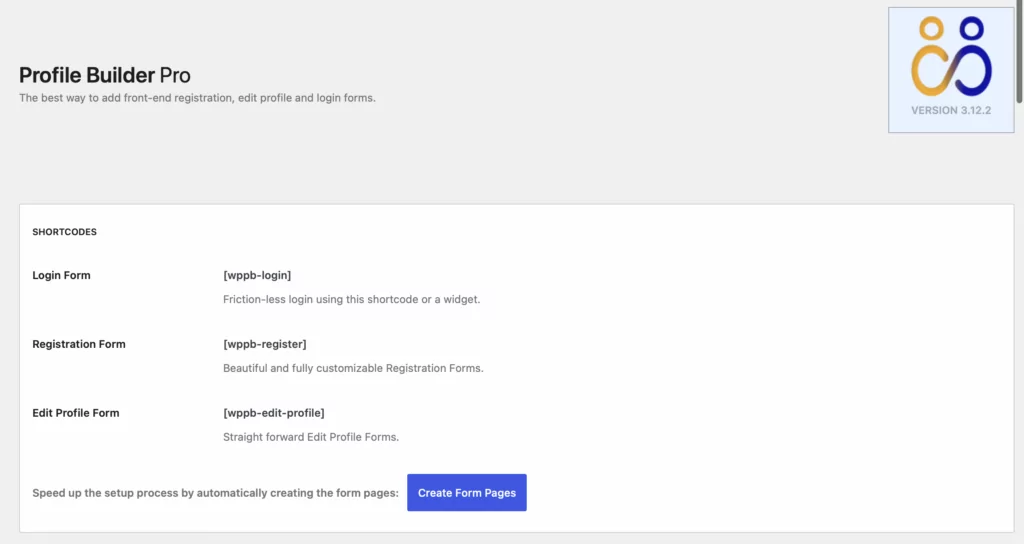
This allows the plugin to automatically create a new page for your custom registration form. Alternatively, you can add a registration form to any page on your site using the Register block or shortcode.
The next thing to do is choose the design of your form by going to Profile Builder → Settings → Design & User Experience:
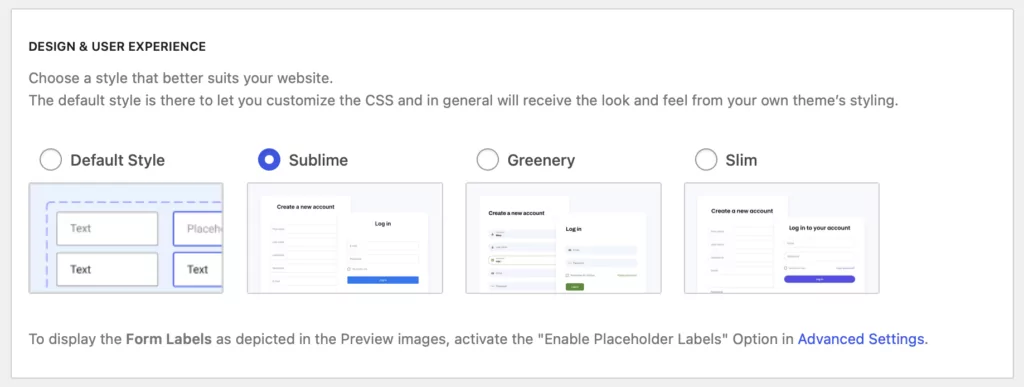
Besides the default design, you’ll find three additional styles which you can preview before activating.
Now, let’s customize your form’s content. You’ll need to switch to the Form Fields section of the plugin. You can remove any fields that you don’t need and add new fields using the Field dropdown at the top of the page:
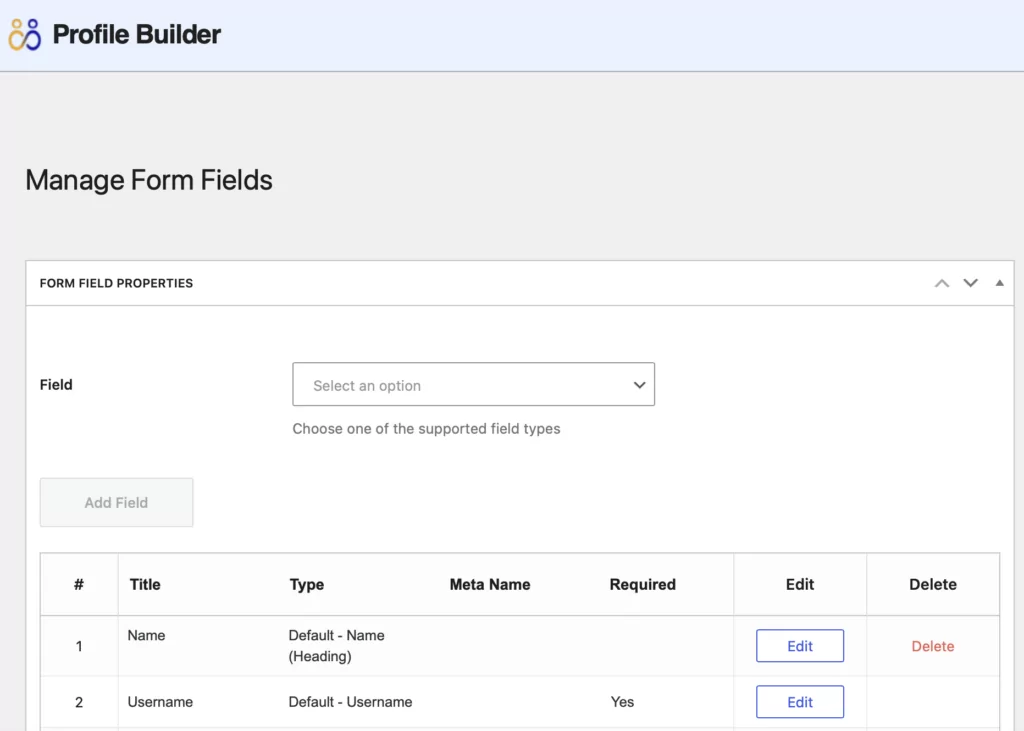
Here, you’ll find time zones, country selectors, nicknames, biographical information, and more. You can also add custom fields by choosing the type (standard input, checkbox, select, etc).
Then, you can provide a field title and description for each one. You might also need to add relevant options and labels:
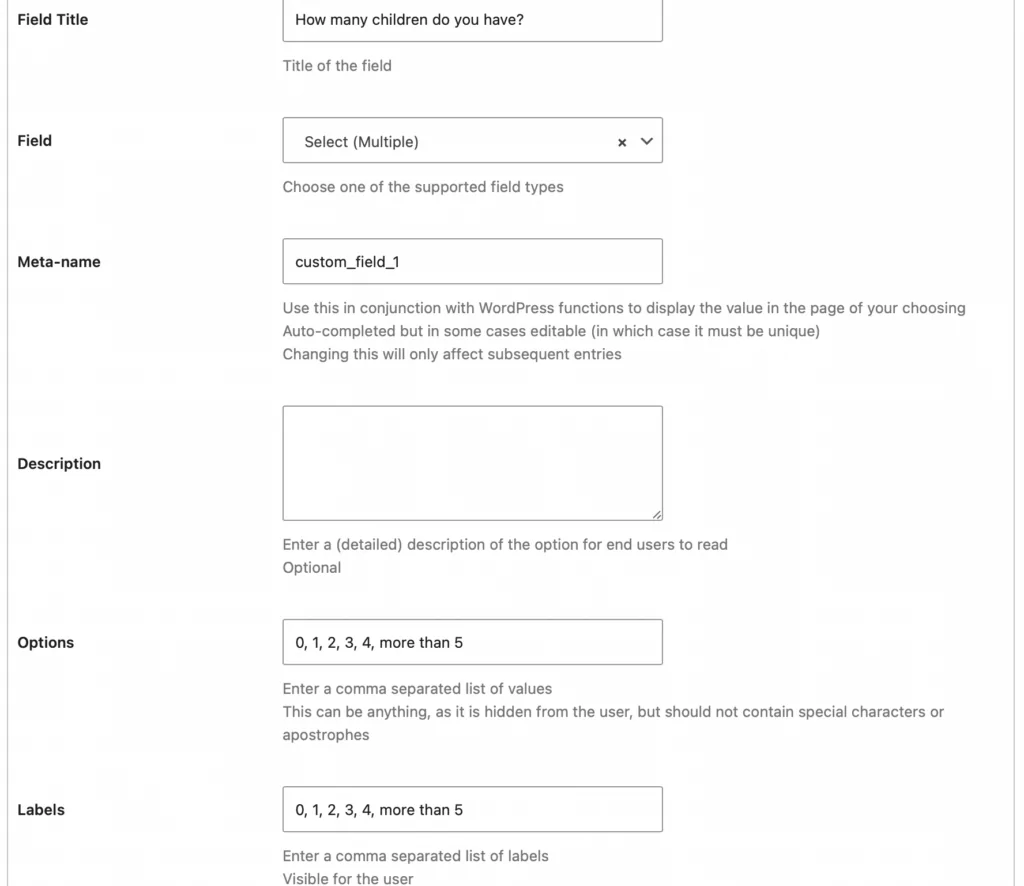
And, you can configure required fields and/or enable conditional logic. Make sure to save the changes when you’re done.
Then, you can go to Pages → All Pages and edit your registration page (note that you can add the registration form to any page on your site using shortcode or blocks). Here, you can preview your page on the front end to see how it looks:
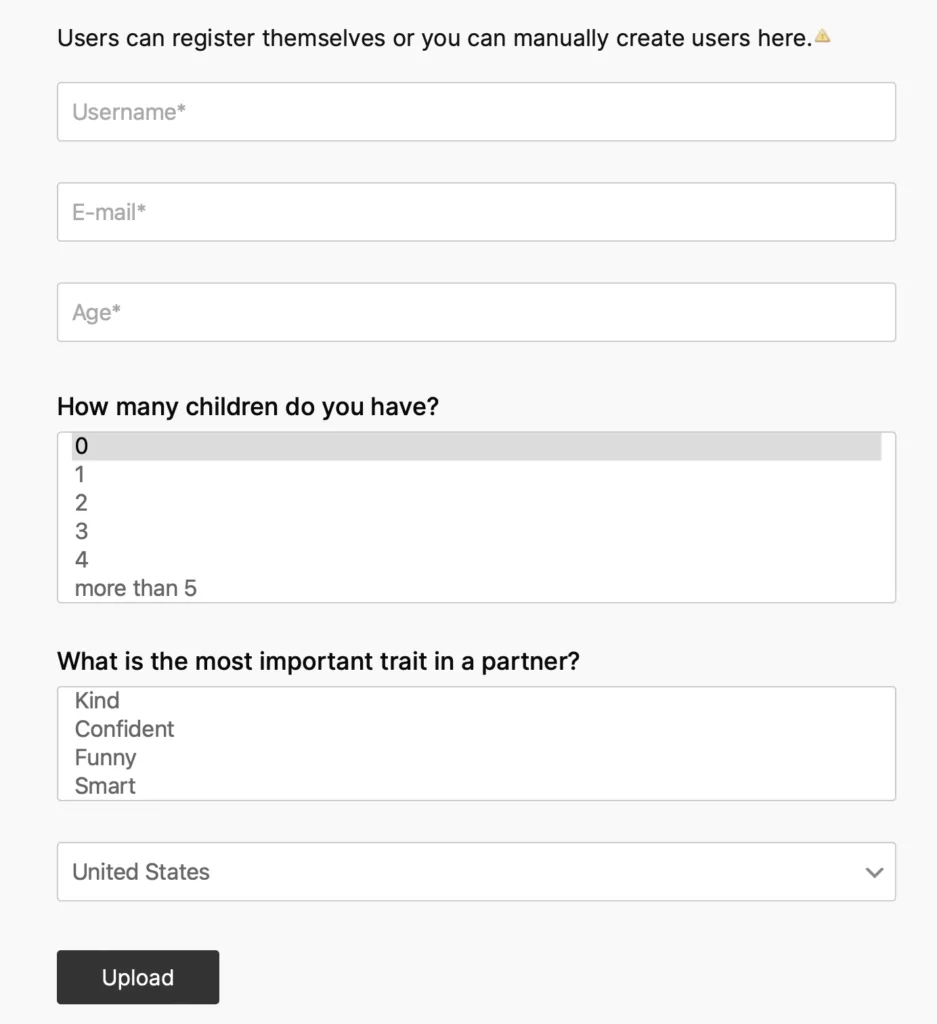
You can even log out of the WordPress dashboard and try signing up yourself to make sure everything works correctly.
Step 2: Set Up User Profile Forms
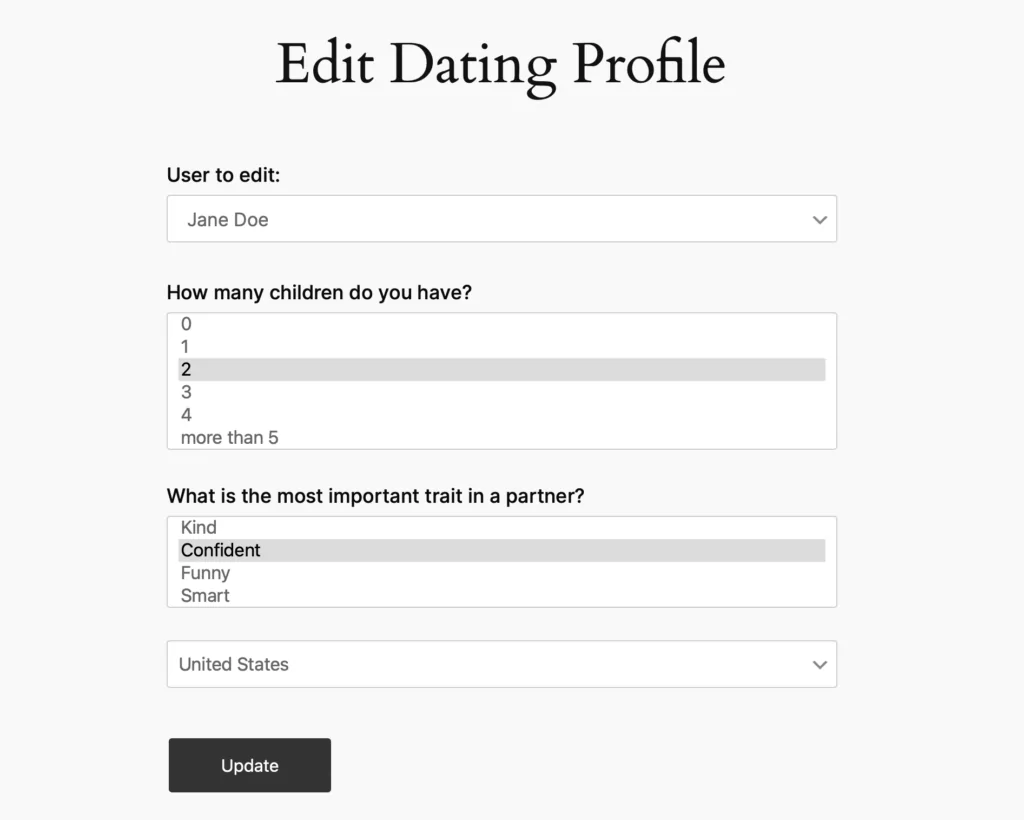
Besides setting up a custom registration form, you can also create a unique edit profile form that appears in the members’ account area.
If you’re using the free version of Profile Builder, you’ll have to use the same fields from the registration form. Otherwise, you can install the Multiple Edit Profile Forms add-on to create a custom set of fields (different from your registration form fields).
If you installed the add-on, go to Profile Builder → Edit-profile Forms → Add New:
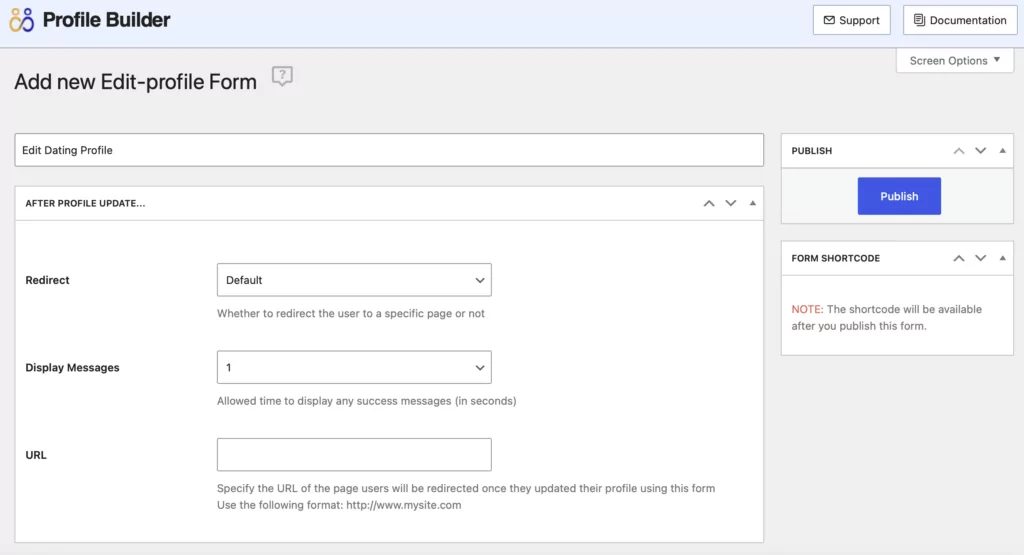
Give the form a title and specify an action that will take place after members have updated their profiles. You can remove, edit, and add new fields as shown earlier for the registration form.
You’ll have to save and publish your new edit profile form before you can use it.
Next, go to Paid Member Subscriptions → Settings → Membership Pages:
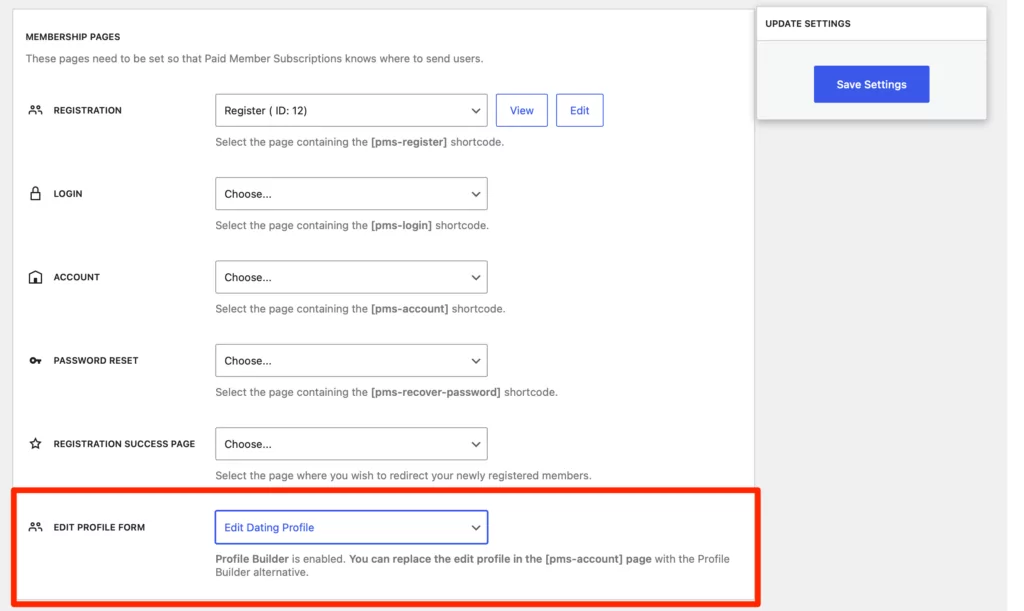
Use the Edit Profile Form dropdown to select the custom form you’ve just created. Then, save your settings and test the form on the front end of your site:
Using Profile Builder, you’re also able to create custom login forms and add them to any page on your site.
Step 3: Implement Social Functionality
Naturally, if you want to create a dating site, you’ll need to add some kind of social functionality that enables members to interact with one another.
BuddyPress is a robust social network software that supports private conversations, user groups, and activity streams. It also lets you display dynamic lists of active members and new profiles.
Better yet, if you’re already using Profile Builder Pro or Agency, you can activate the BuddyPress add-on directly within the dashboard. You will also need to install the BuddyPress plugin separately for the add-on to work.
After that, head to Profile Builder → BuddyPress to import BuddyPress fields to Profile Builder (if you’ve been using the BuddyPress plugin previously) and replace the default BuddyPress forms and user listings:

For full details, check out our documentation.
You can enable/disable certain options (like private messaging and activity streams) by going to Settings → BuddyPress:
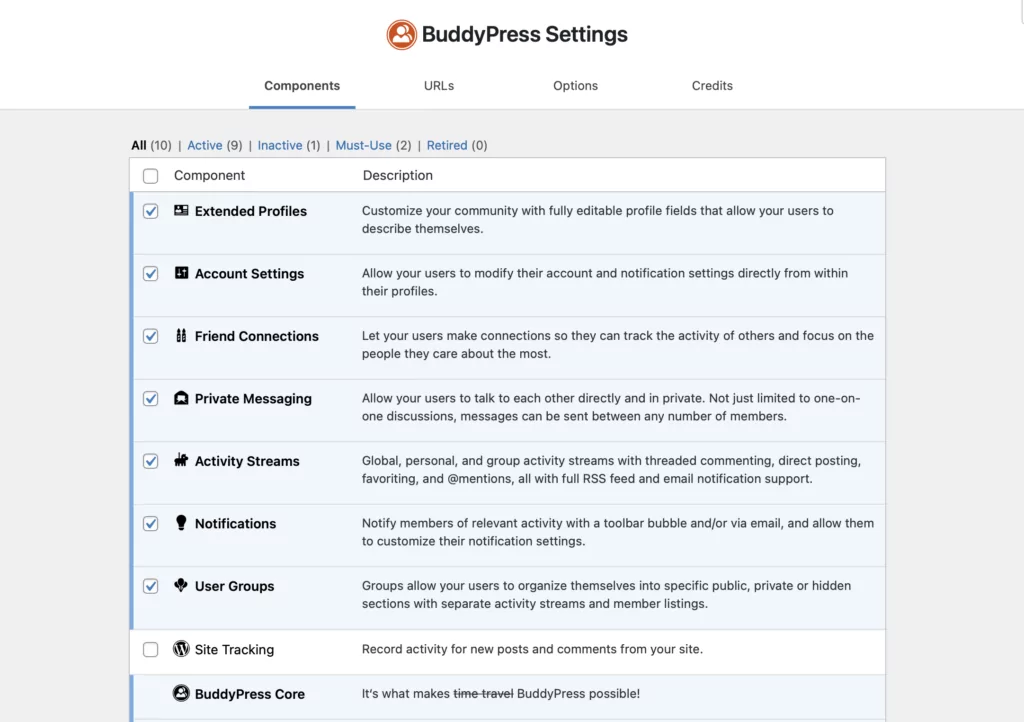
Private messaging is particularly useful since it enables like-minded members to communicate with one another. This way, users can reply to messages and compose messages of their own to send to people on their friends list.
Step 4: Set Up a Member Directory
The next step is to configure a searchable index of members. Fortunately, you can use Profile Builder to do this.
You’ll have to return to the Form Fields section of the plugin if you want to add/remove fields (or create custom ones). For example, you might want to include an avatar field so that users can upload a profile picture.
You’ll also need to go to Profile Builder → Add-Ons to enable the User Listing module. Then, head to Profile Builder → User Listing to add your new user listing to display on the front end of your site:

Here, you can specify which user roles/users of specific subscription plans to display. You can also set the avatar size and control visibility settings. Plus, you can determine the number of users to display per page, configure sorting criteria, and adjust the default sorting order.
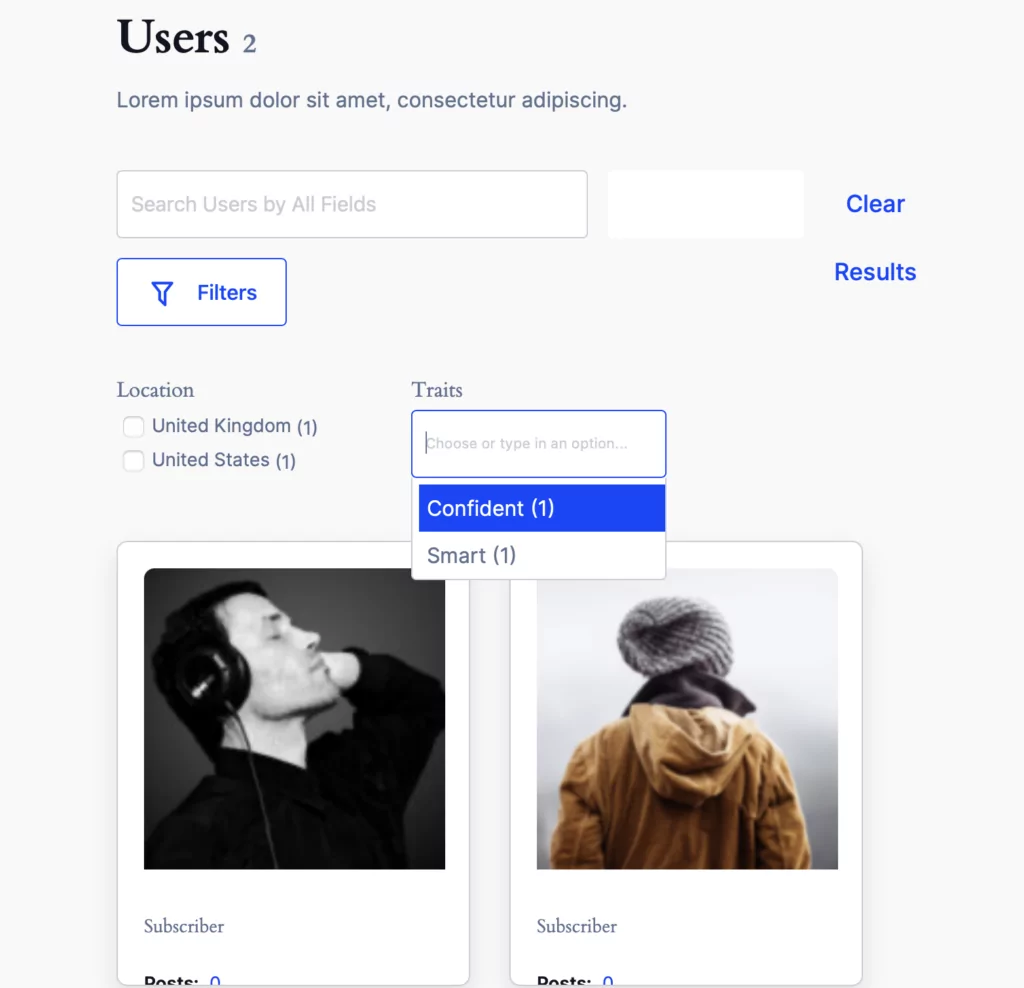
One of the best things about Profile Builder is that you can also set up faceted menus which allow people to search for members, based on options saved in user meta information:
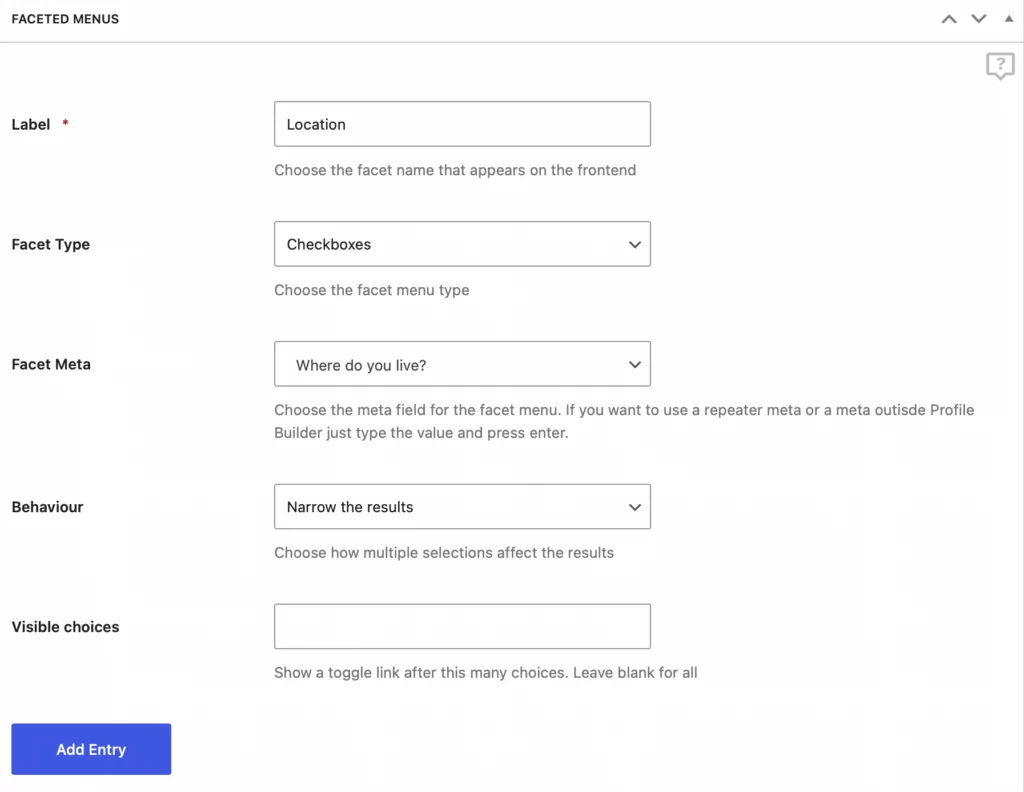
For example, they could search for users by location, so that they can connect with people who live nearby.
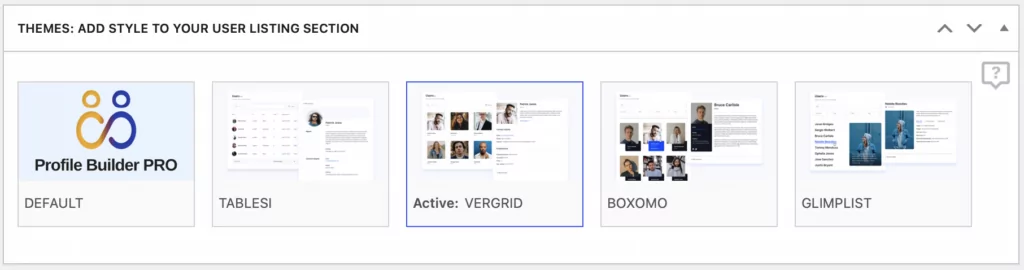
The final step is to edit the user listing templates so that they slot in nicely with your website’s design. Near the bottom of the page, you’ll find five pre-designed templates which you can preview before activating:
All that’s left to do now is publish your user listing. Then, you can add the listing to a WordPress page using the shortcode or block, and preview your member directory on the front end:
At this point, you can start registering new users and displaying their profiles in your member directory. This makes it easy for users to browse and connect with others.
Step 5: Configure Your Membership Plans
Typically, dating sites are restricted to registered users only so that personal profiles aren’t publicly accessible. Therefore, you’ll need to add at least one membership option, even if you want to make it free to sign up.
Or, you can add a free membership level as well as premium subscriptions that come with extra perks. For example, higher-tier plans may get a first look at new members or access to a community forum.
Once you’ve activated the plugins we discussed above, you can navigate to Paid Member Subscriptions → Subscription Plans → Add New:
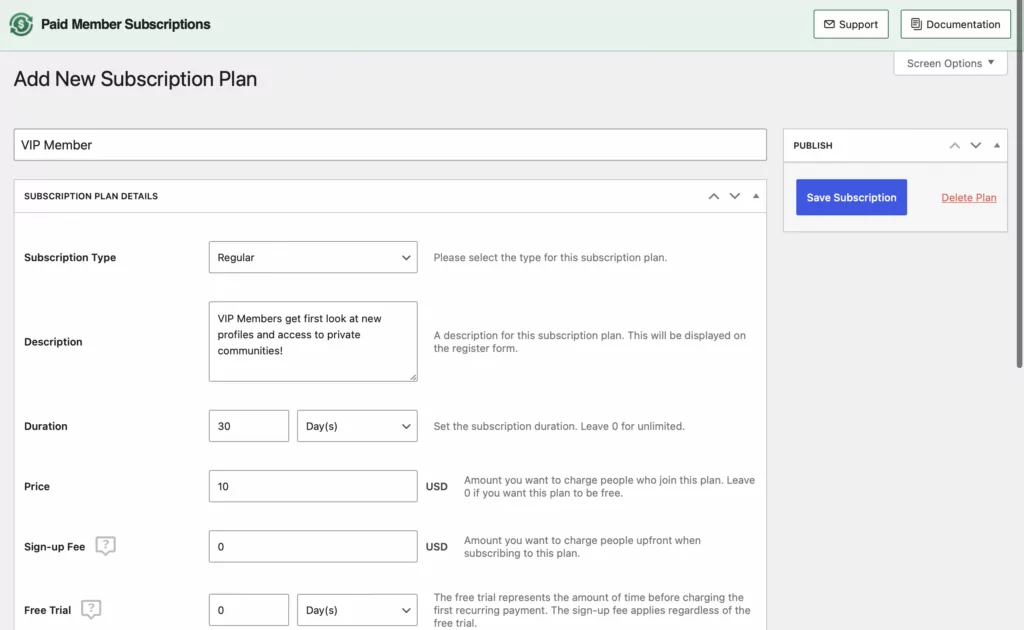
Here, give your membership level a name and highlight the benefits of signing up in the Description box. You can then set the duration of the subscription and define the price. If you want to offer a free membership option, leave the value at “0”.
Fill out the rest of the settings where you can charge a signup fee, enable a free trial, and force automatic renewals. Once you’re done, click on Save Subscription.
You can add more membership levels in the same way. You can even use the Add Downgrade or Add Upgrade button at the top of the page to make it easier.
Step 6: Restrict Access to Premium Content
If you have content on your dating site that’s exclusive to members, you’ll need to restrict access to it. For instance, you may have premium resources, forums, or a members-only area.
Let’s say you set up a membership plan in the previous step that serves your highest-paying customers. You may want to create a dedicated VIP area where members can access expert dating tips or join private forums.
So, once you’ve added your private content as one or more new pages, open the page editor on the ones you want to restrict. In the page editor, scroll to the bottom of the page to find the Content Restriction section:
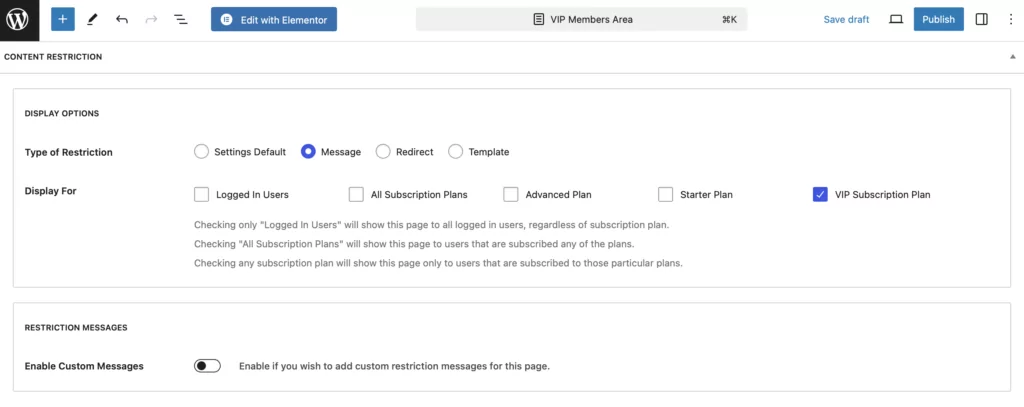
Select the type of restriction you want to apply. For instance, you can redirect unauthorized users or display a custom message. Then, determine which users can view your page.
You can choose from all logged-in users, all subscription plans, or members of a specific subscription plan. In this instance, we’d need to check the box for the VIP Subscription Plan.
Conclusion
You might be a natural-born matchmaker, or maybe you’re just tired of weeding through over-saturated dating sites and apps. Either way, you’ve probably realized the potential of setting up a dating site that serves a more niche audience. This way, you can match people up quicker (and more accurately).
To recap, here’s how to create a dating site in six steps:
- Create a custom registration form so users can sign up.
- Set up user profile forms so users can customize their profiles.
- Implement social functionality so members can interact with one another.
- Set up a member directory so users can see each other’s profiles.
- Configure your membership plans to monetize your site.
- Restrict access to premium content in order to incentivize people to sign up.
Do you have any questions about how to create a dating site in WordPress? Let us know in the comments below!
Related Articles

How to Automate WordPress with a Workflow Automation Tool
Interested in WordPress automation but not sure where to begin? In this post, we're going to cover everything that you need to know about automating WordPress. We'll start with some of the different reasons to consider using automations. After that, we'll give you a generalized tutorial on how to use a WordPress automation plugin named […]
Continue Reading
Roundup of WordPress ecosystem #1 – January 2017
After writing the article "Overview of the WordPress Community in 2016" and getting feedback for the article on various platforms, I decided to continue writing them, but I changed its name into "Roundup of WordPress ecosystem". This is the first article from a monthly series that will showcase what happened around the whole ecosystem in […]
Continue Reading
How to Create a Website for Affiliate Marketing
If you’re looking for a side hustle or want to create a passive income stream, affiliate marketing can be a good option. This involves promoting products by other companies, which can lead to commissions on sales and leads. But to get started, you’ll need to set up a website. Thanks to WordPress, creating a website […]
Continue Reading