

Table of Contents
Are you looking for a convenient way to offer online courses to a global audience? Then you might be wondering how to create an eLearning website. This way, you can create engaging online learning materials to equip learners with useful knowledge or exciting practical skills.
Naturally, you’ll need a platform to host your course content like lessons, assignments, and quizzes. Plus, you can even offer free courses for your community or certified courses for advanced learners. And, you have the option to monetize your content to earn revenue.
In this post, we’ll take a closer look at the reasons to make an eLearning site. Then, we’ll explore some unique examples before we show you how to create an eLearning website yourself. Let’s get started!
Why You Should Create an eLearning Website
While online learning had been quietly growing in popularity, the COVID-19 pandemic meant that many schools and colleges had to rely on digital platforms to continue educating students. Still, many higher education courses remain partially online, so the demand is still there.
There are plenty of advantages to offering online learning solutions compared to in-person courses. One of the main reasons why online learning is so popular is due to its affordability. Digital resources tend to be much cheaper than physical ones which enables students to save money.
Plus, learners don’t need to spend money commuting to a physical destination. This also means that location isn’t an issue. You can provide courses for students all over the world, rather than being limited to people in your area.
Additionally, eLearning is much more convenient than in-person classes. Typically, lessons are pre-recorded or pre-configured, so they can be taken at any time of day. This makes eLearning much more accessible to people who have other responsibilities and can’t always keep to a fixed schedule.
Best eLearning Website Examples to Inspire You
Before we show you how to create an eLearning website, let’s take a look at some real life examples that can function as an eLearning website template for your own ideas.
First off, TreeHouse is an exciting online technology school that allows people to learn web design, website development, game development, and more:
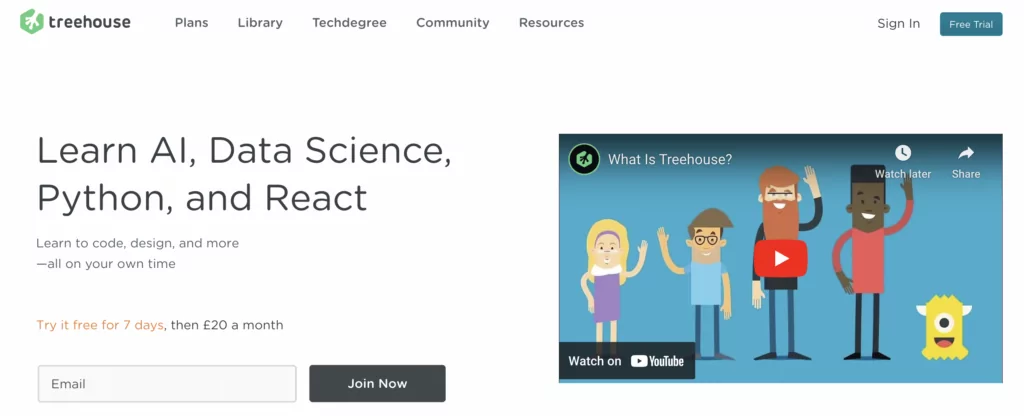
All courses are split into two parts: the first consists of pre-recorded video tutorials while the second contains quizzes to test users’ knowledge. There are also live sessions, resources, and member forums for users to interact with one another.
Codeacademy is one of the best examples of eLearning sites. It teaches students various programming languages, and there are free resources available too:
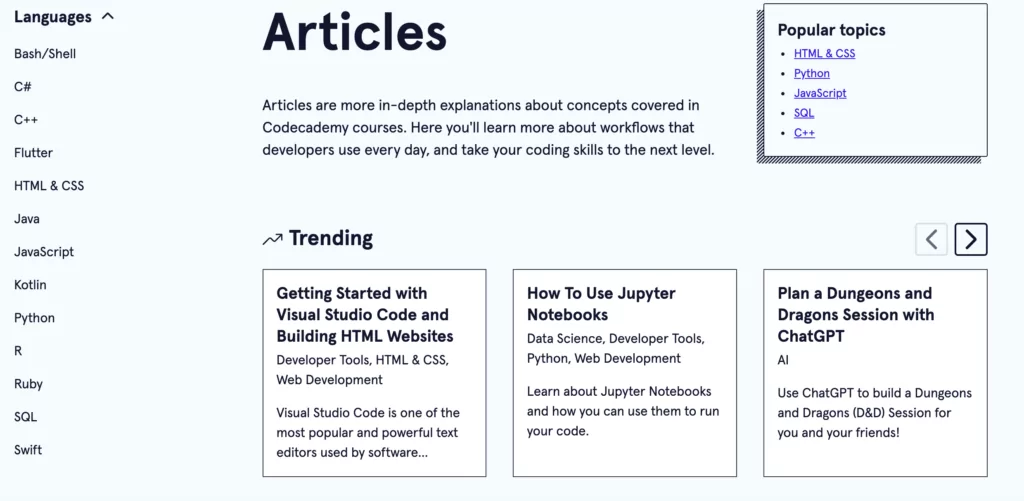
Better yet, Codeacademy utilizes gamification elements including a points system that encourages students to complete practical tasks to assess their coding skills.
With over 30,000 members, the Association for Talent Development (ATD) is a popular eLearning site that offers a mix of free courses and certificate programs:

You’ll find tons of free resources as well as events that are held in-person (and online) including conferences and webinars. Meanwhile, students can choose courses based on their preferred learning method including live online and on demand.
How to Create an eLearning Website with WordPress (4 Steps)
Now that you’re feeling inspired, let’s show you how to create an eLearning website. We’re going to use WordPress to host your course content since it’s free, flexible, and beginner-friendly.
You can configure your server yourself (if you have the technical skills). Or, you can use a quality web hosting provider that’ll install the software for you.
Not only that, but you’ll need a domain name and an SSL certificate. The good news is that plenty of web hosts like Bluehost offer dedicated WordPress plans that come with free domains and certificates.
1. Install the Tutor LMS Plugin
Assuming you’ve got your WordPress site set up, the first order of business is installing the right plugin. You’ll use plugins to extend the base functionality of the platform.
For example, Tutor LMS enables you to transform a simple WordPress site into a complete learning management system that handles all eLearning tasks and processes:

Better yet, there’s a free version of the Tutor LMS plugin if you want to test its functionality first.
Or, you can pay for a premium plan to access advanced features and add-ons. A neat feature of Tutor LMS is that you can create an unlimited number of courses. Plus, the plugin facilitates real-time learning and course monetization.
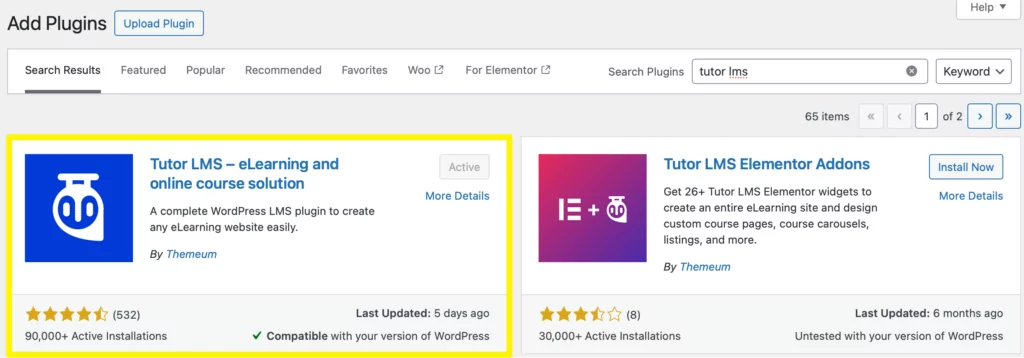
If you’re using the free plugin, you can install it directly through the WordPress dashboard by going to Plugins → Add New. Then, find Tutor LMS using the search bar and click on Install Now → Activate:
For the paid version, you’ll still need to install the free plugin for the premium plugin to function properly. Then, download the purchased file from the official Tutor LMS website. Next, click on Upload Plugin and drag the zip file onto the page.
2. Create Your Online Courses
If you’re wondering how to create an eLearning website, head to Tutor LMS → Courses → Add New. Here, you can add all the details for your eLearning course including a title, description, category, and featured image.
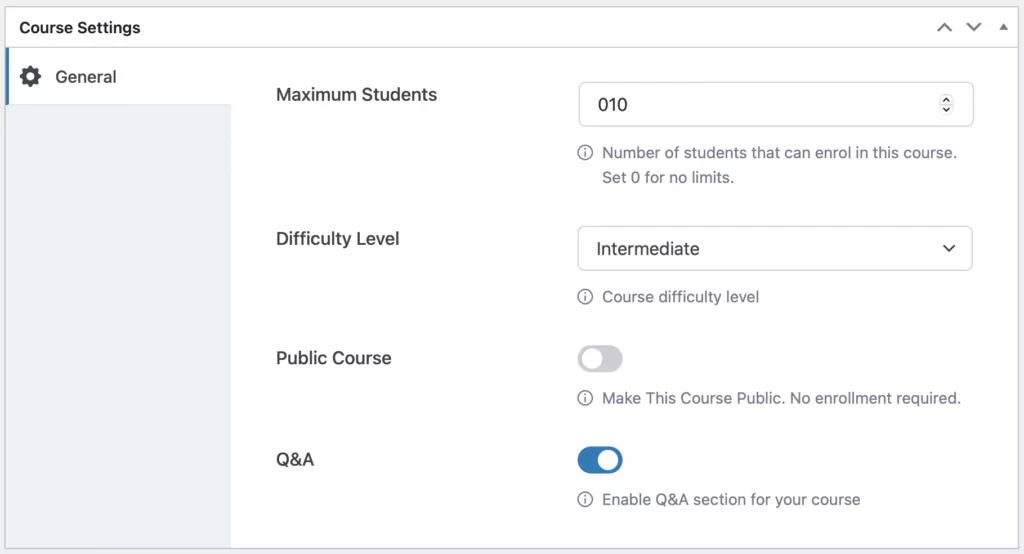
Scroll down to the Course Settings to define a maximum number of students, select a difficulty level, enable a Q&A section, and more:
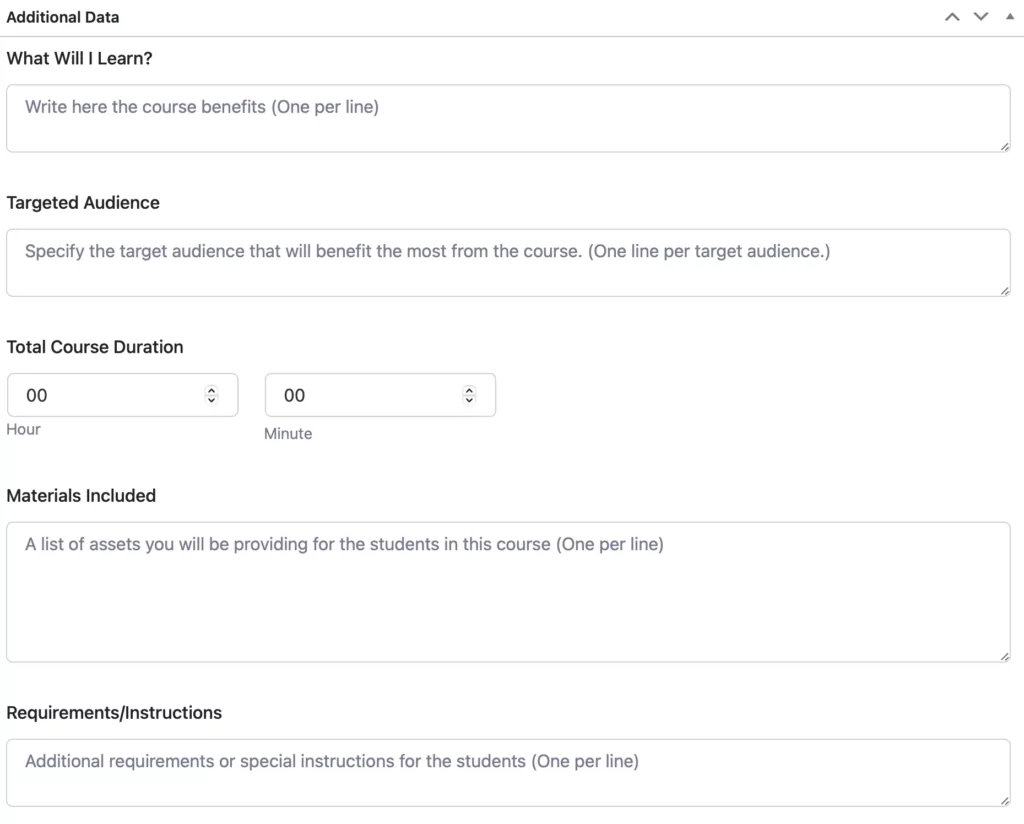
Skip ahead to the Additional Data section which allows you to specify the target audience and course benefits. You can also set the course duration and provide any instructions or special requirements for your course:
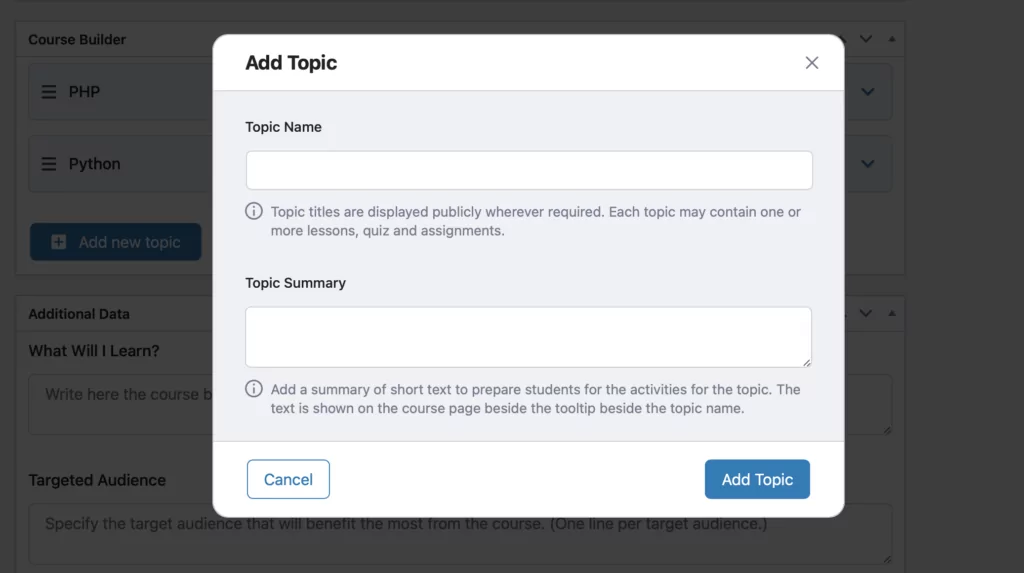
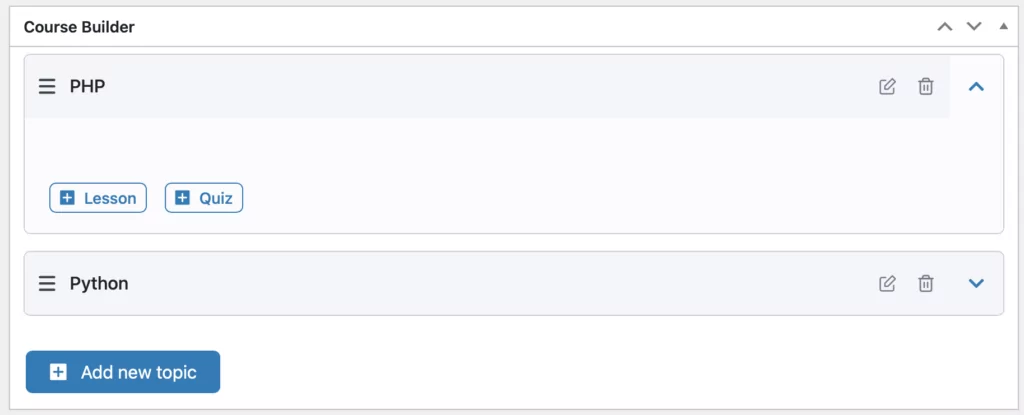
Now, navigate to the Course Builder section to add your content. Click on Add new topic and enter a topic name and summary:
The course hierarchy can be a bit confusing, but essentially you’ll have various topics – all of which contain lessons, quizzes, and assignments. Simply select the relevant topic and you’ll see the options to add lessons or quizzes beneath:
For each lesson, you can provide a summary and featured image. Plus, you can include attachments and videos. If you want to use videos in your lessons, you’ll first need to go to Tutor LMS → Settings → Course and scroll down to the Video section:
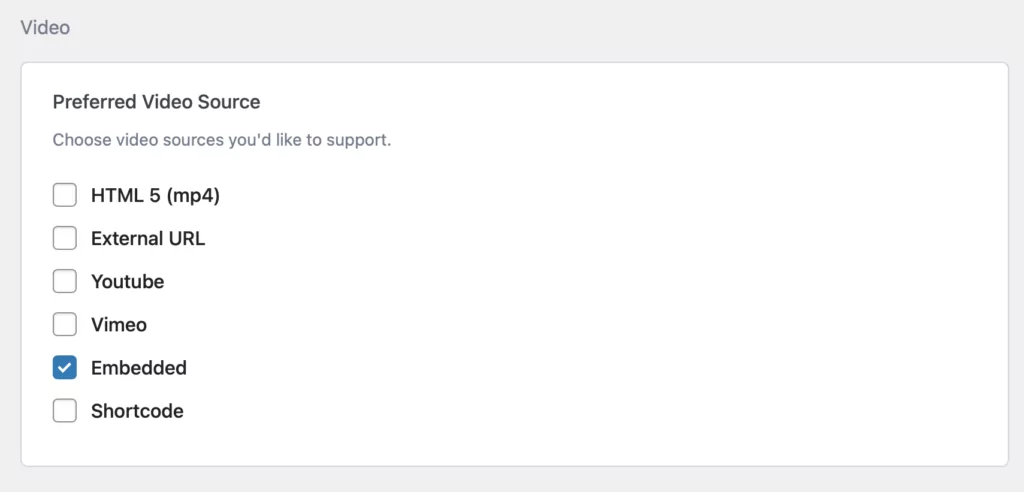
Here, specify your preferred video sources (like YouTube, Vimeo, or Embedded) and save the changes. If you choose the latter option, you can then return to your lesson, select the video source, and place the embed code in the box.
3. Add Quizzes to Your Course Topics
As we mentioned in the previous section, you can also add quizzes to each course topic to assess users’ knowledge. Simply click on the Quiz button and enter a title and summary of your quiz.
Next, you can write out your questions and select your question type:
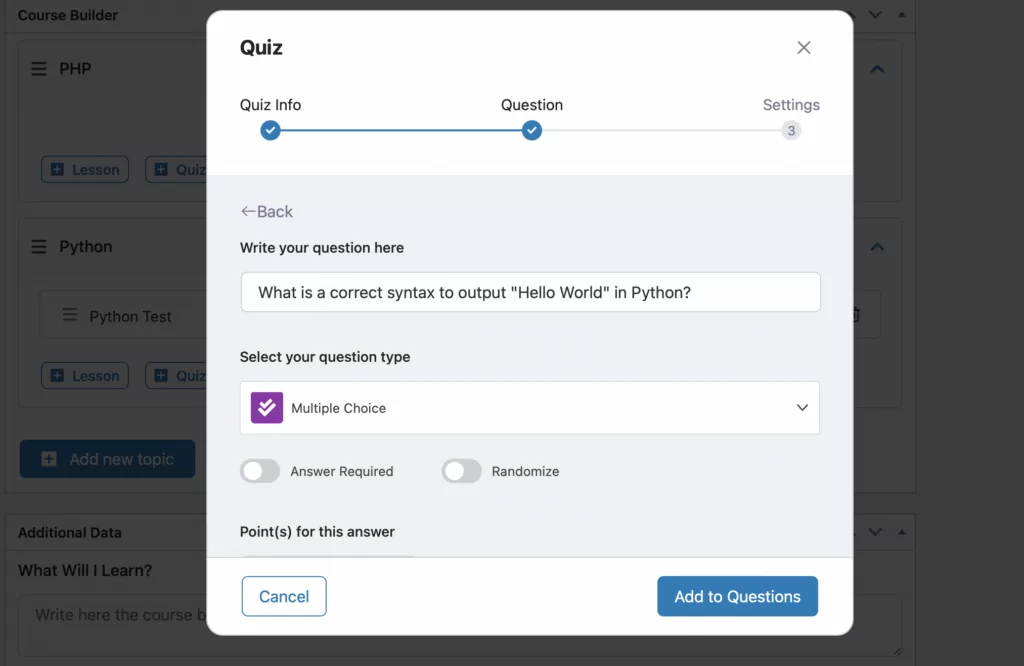
Tutor LMS provides 10 types of questions (6 with the free plugin) including true/false, multiple choice, and fill-in-the-blanks.
You can also randomize the options and make the question mandatory using the relevant toggles. Plus, you can dictate how many points students will earn for each question. For instance, you might want open-ended questions to carry more weight than true/false questions.
At the bottom of the popup, you can input the answer options (if multiple choice) and select the correct one. Then, you can add more questions before proceeding to the quiz settings:
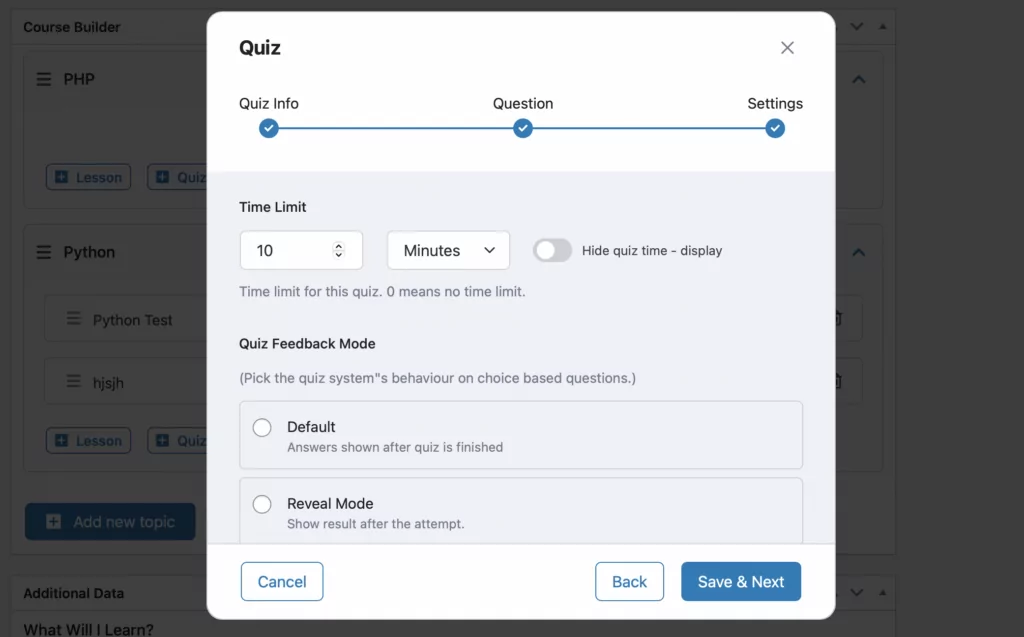
Here, you can set a time limit for quiz completion, restrict the number of quiz attempts, define a passing percentage, and more.
4. Monetize Your eLearning Website
By now, we’ve shown you how to create an eLearning website. But, if you want to sell courses, you’ll need to integrate an eCommerce engine into the plugin.
Paid Member Subscriptions is an excellent option since you can access three different types of course restrictions.
Paid Member Subscriptions Pro
Accept (recurring) payments, create subscription plans and restrict content on your website. Easily setup a WordPress membership site using Paid Member Subscriptions.
Get Paid Member SubscriptionsPlus, you can configure dedicated subscription plans that provide access to certain courses. And, you’re able to completely customize the register and login forms for your members.
The premium version of the Paid Member Subscriptions plugin comes with advanced features and add-ons, but you can access the Tutor LMS integration with the free version. Once you install the Paid Member Subscriptions plugin, navigate to Tutor LMS → Settings → Monetization:
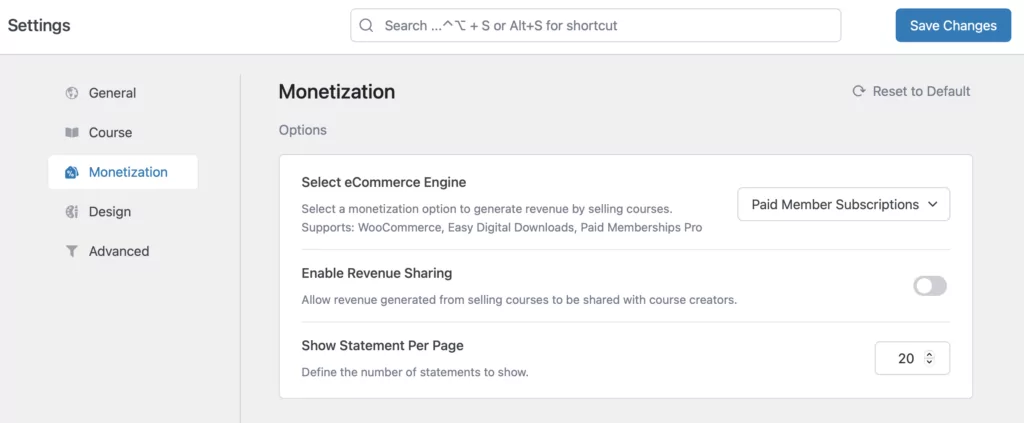
Then, select Paid Member Subscriptions as the eCommerce engine. After that, you can go to Paid Member Subscriptions → Settings and switch over to the new Tutor LMS tab:
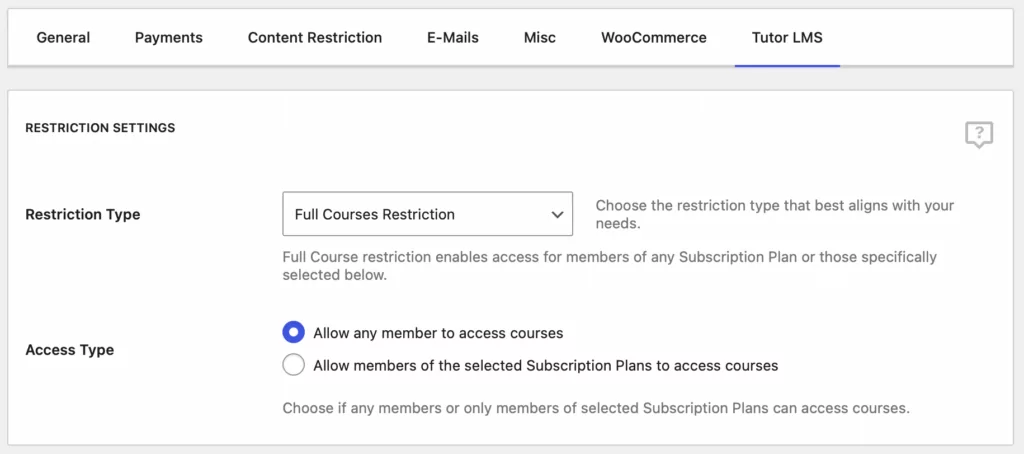
Here, you can apply three types of course restrictions including full course restrictions, category restrictions, or individual restrictions. For the former method, you can allow any member to access and enroll in your courses (regardless of their subscription plan).
But, you can also configure the settings so that users need a specific subscription plan to access your course. This enables the Subscription Plans setting where you can choose one or more of your plans. For full details, check out this guide.
You can choose to make your subscription plans free, just so you can grow a user base for your eLearning website. But better yet, you can take things further and charge a recurring fee in exchange for your access to your courses. Here’s a guide on how to enable recurring payments for your website.
Conclusion
eLearning provides a flexible, convenient solution for people that lack the time to attend in-person classes (or are restricted by their geographic location). It’s also a great way to nurture a thriving online community and earn revenue.
To recap, here’s how to create an eLearning website in four simple steps:
- Install the Tutor LMS plugin.
- Create your online courses.
- Add quizzes to your course topics.
- Monetize your eLearning website with Paid Member Subscriptions.
Paid Member Subscriptions Pro
Paid Member Subscriptions and Tutor LMS is the perfect combo to build your eLearning website without breaking the bank. Or your back.
Get Paid Member SubscriptionsDo you have any questions about how to make an eLearning site? Let us know in the comments below!
Related Articles

How to Set Up WooCommerce Stripe Subscriptions with Recurring Payments (3 Methods)
Are you searching for a way to set up WooCommerce Stripe subscriptions? Setting up recurring subscriptions is a great way to build regular, dependable revenue for your website. And when it comes to processing payments, Stripe is one of the top options thanks to its competitive fees and flexible feature set. However, WooCommerce doesn't include […]
Continue Reading
5 Best WooCommerce Subscription Plugins
Subscriptions are a very common payment model, but WooCommerce doesn’t natively support recurring payments out of the box. This is where the power of using a WooCommerce subscription plugin comes into play. With this tool, you can start selling memberships, subscriptions, and product bundles. This way, you can increase your income through renewal fees and […]
Continue Reading
Subscription Business Ideas: 10 Ways to Make Money in 2025
Are you after brilliant subscription business ideas to spark your imagination, get your creative juices flowing, and make money in 2024? If that's a yes, you came to the right place. The subscription-based business model has gained tremendous popularity in recent years. According to a report by Statista, e-commerce sales via the subscription model in […]
Continue Reading