

Table of Contents
Support groups can be an essential part of the recovery process for people battling mental health issues, addiction, and disordered behavior. But in-person meetings restrict access to those that live nearby. Plus, in-person settings can be overwhelming and trigger feelings of anxiety for some people.
Therefore, you might be wondering how to start a support group website which can be a more convenient solution. This also means that you can open up your website to people all over the world and set up a safe space for members to connect with like-minded individuals.
In this post, we’ll take a closer look at the reasons to create a support group. Then, we’ll show you how to start a support group website in five simple steps. Let’s jump in!
Why You Might Want to Create a Support Group
You might be a support worker, or maybe you’re struggling with something yourself. Whether it’s your mental health, substance abuse, or any kind of addiction issues, support groups play an important role in the recovery process.
The most obvious benefit is that group members get access to an entire community of people who are experiencing similar problems. This can make people feel less alone. But it also means that members are surrounded by others who can keep spirits high when things get tough.
This can be essential in helping people reach their goals and staying healthy. Not only that, but support groups offer valuable resources like blog posts and digital materials that share real-life stories or coping strategies. Plus, you can set up forums to encourage members to interact.
How to Start a Support Group Website (In 5 Steps)
Now that you know why it can be useful to create a support group, here’s how to start a support group website.
1. Set Up a WordPress Site and Install Profile Builder
If you’re wondering how to start a support group website, you’ll need a content management system (CMS) to house resources like pages, posts, forums, etc. WordPress is one of the most popular options, powering over 43 percent of all websites:
Not only is it a beginner-friendly platform, but it’s open-source, so it’s completely free to use. That said, if you don’t have the skills to configure a server, you’ll need a web hosting provider.
You can even opt for managed hosting services, which come with essential elements like a domain name and SSL certificates. Plus, these packages tend to provide security and performance features to help your site run smoothly.
However, you’ll also need to install a plugin like Profile Builder to add extra functionality to the base WordPress setup:
Profile Builder Pro
Create beautiful front-end registration and profile forms with custom fields. Setup member directories, custom redirects, cutomize user emails & more using the all in one user management plugin.
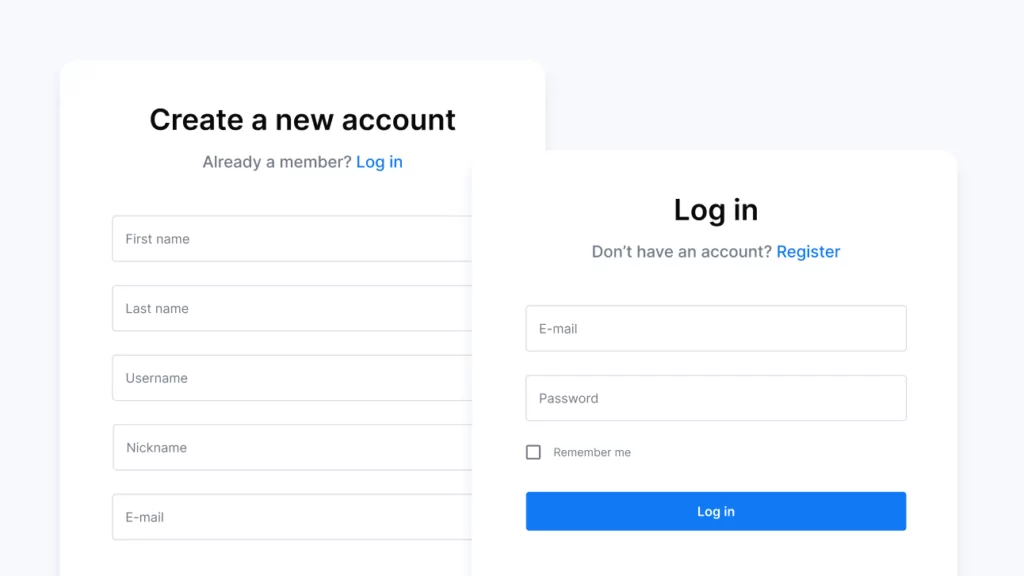
Get Profile BuilderThis way, you can create beautiful custom registration and login forms that offer more flexibility than the default WordPress options. For example, you can add your own fields, enable social logins, and even create multi-step signup forms.
On top of this, you can set up custom user roles and restrict access to areas of your website. This enables you to create private forums for members, or restrict access to content pages. You can also use the plugin to design stunning directories to display all of your group members.
2. Configure Your Registration Forms
You can use the free Profile Builder plugin to set up a single registration form. But with the Pro version, you can create multiple registration forms.
For example, you might want to make one registration form for peers and another for mentors or sponsors. But to do this, you’ll need the Multiple Registration Forms module.
Once you’ve installed the premium plugin, go to Profile Builder → Add-Ons to activate it. Then, head to Profile Builder → Registration Forms → Add New:
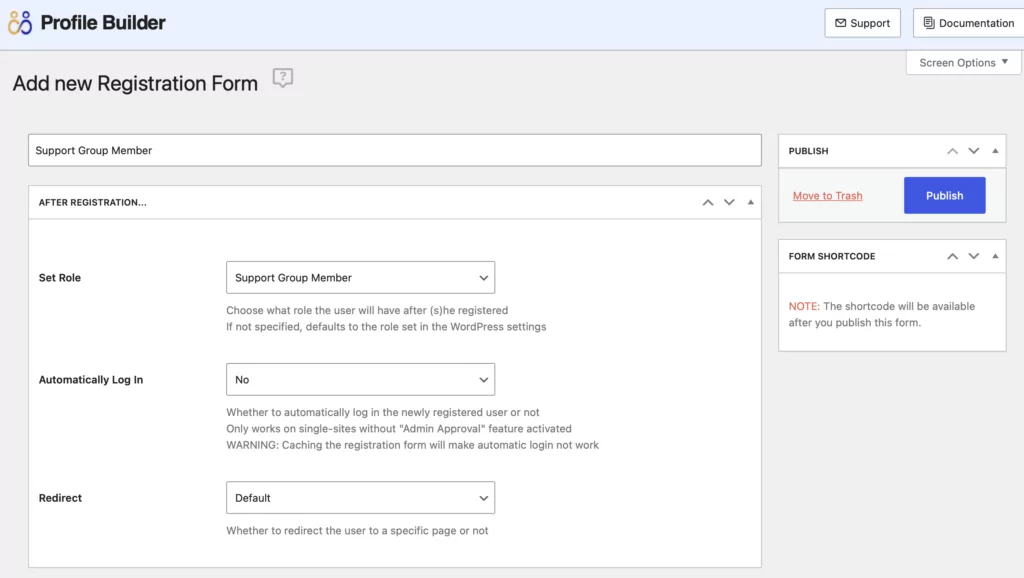
Give your registration form a title. Then, in the After Registration section, define the role that will apply to users who register via this form. You’re also able to manually approve user registrations, but you’ll need to set the Automatically Log In box to No.
Now you can build your registration form by removing fields you don’t need. You’re also able to add new ones using the Field dropdown. But if you want to create new fields from scratch, you’ll need to move to Profile Builder → Form Fields and use the Field dropdown here:
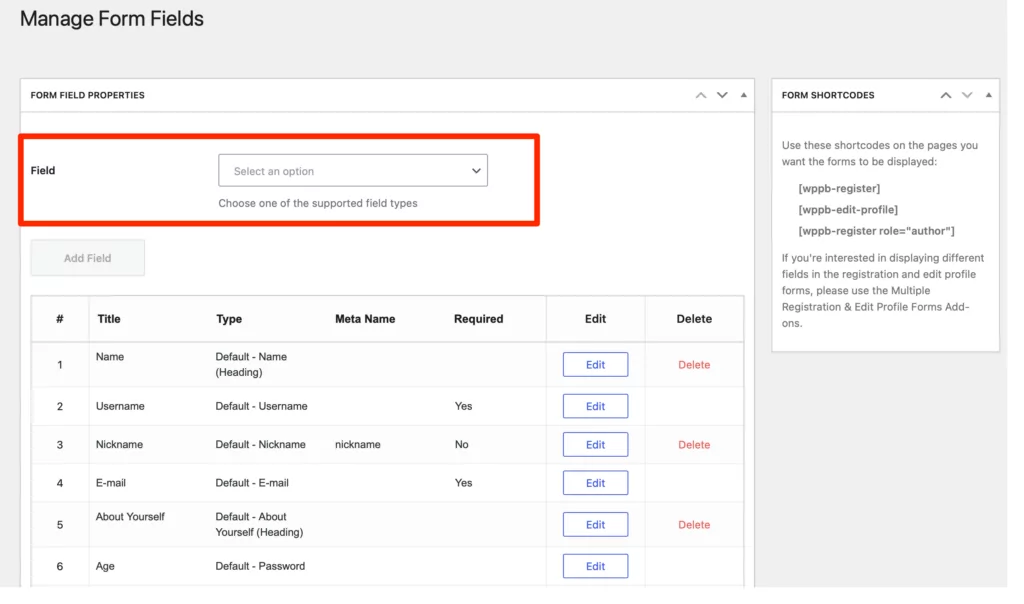
For example, you might want mentors to upload a profile picture, in which case you’d select the Upload option. Or, you might ask users to provide more information about their reasons for seeking support using the Input field.
After that, return to the registration form builder where you should be able to add your newly-created fields to your form. When you’re done, click on Publish and add a new registration form in the exact same way.
Then, you can add forms to any page on your site using the Register block:
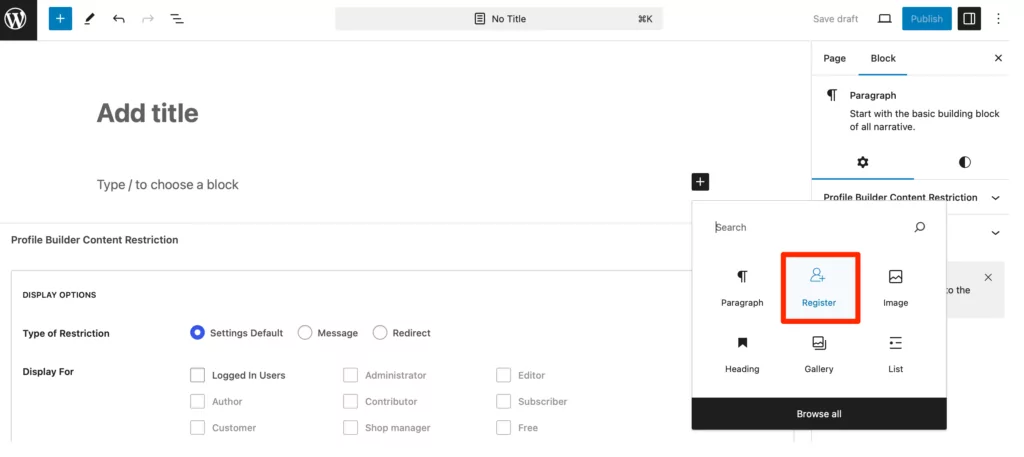
If you’ve set up more than one registration form, you’ll be able to select the correct option from the block’s settings in the right-hand sidebar. You’ll find all your forms in the Form dropdown in the Form Settings.
3. Restrict Content Access to Group Members
When you install Profile Builder, you’ll get access to content restriction settings which let you make pages, posts, and forums, exclusively available to registered users. To enable this feature, go to Profile Builder → Settings.
Click on the Content Restriction tab and activate the feature using the toggle:
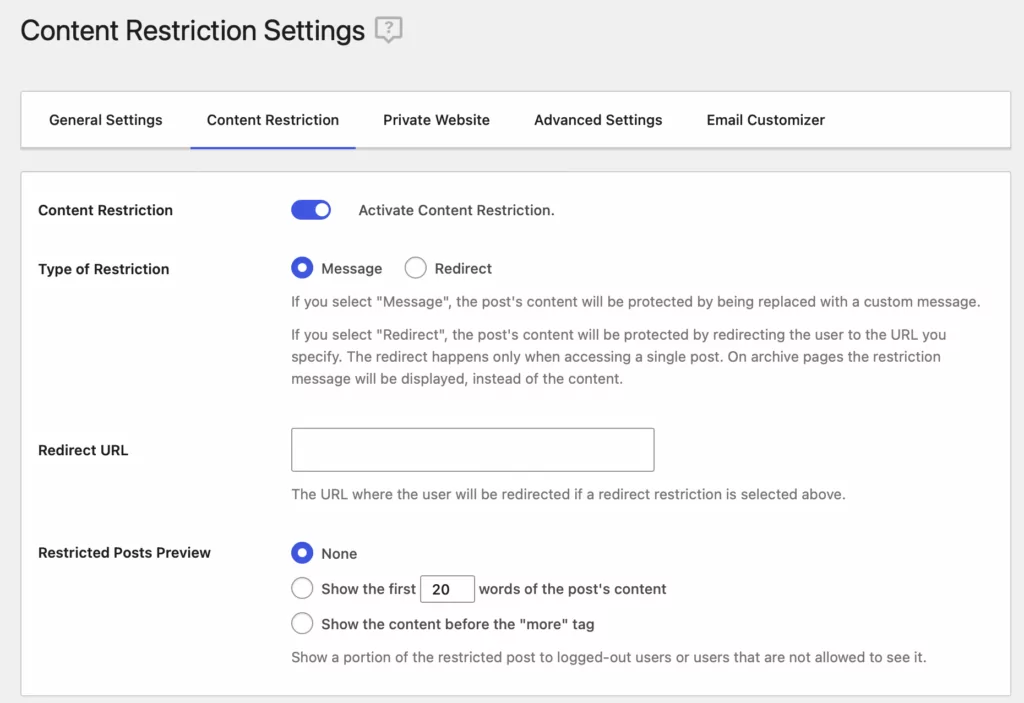
You can then choose whether to redirect users that don’t have access, or display a custom message. These would be your default restriction settings.
Naturally, you’ll need to add content to WordPress first, if you haven’t done so already. Then, you’ll be able to restrict certain pages in particular. Enter the page editor on a page you want to restrict and at the bottom of the Block editor, you should see a new content restriction section:
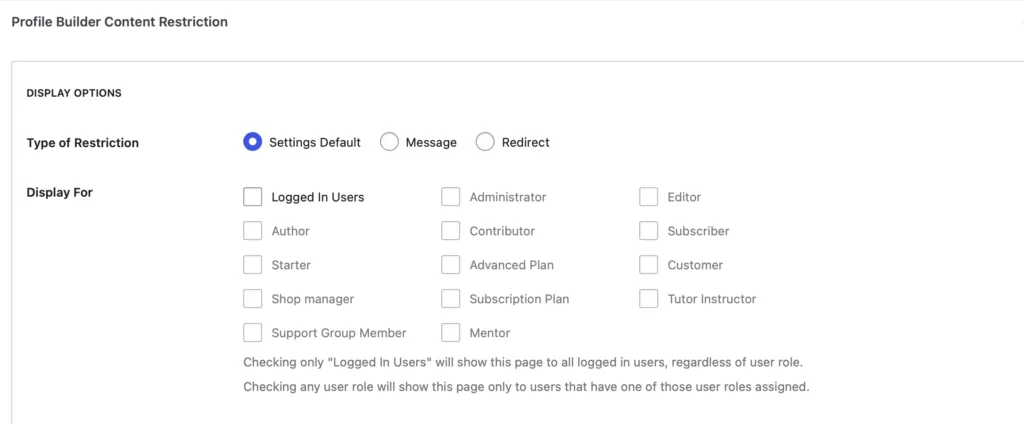
Here, you can choose which users can view your content. You might want to make pages visible to all logged-in users. But you can also define specific user roles. You can customize the type of restriction for that particular page, or go with the default settings you’ve configured before.
If you didn’t already know, you can even create custom user roles with the Profile Builder User Role Editor. So, you might prefer to set these up first and then return to restrict content access to peers or mentors.
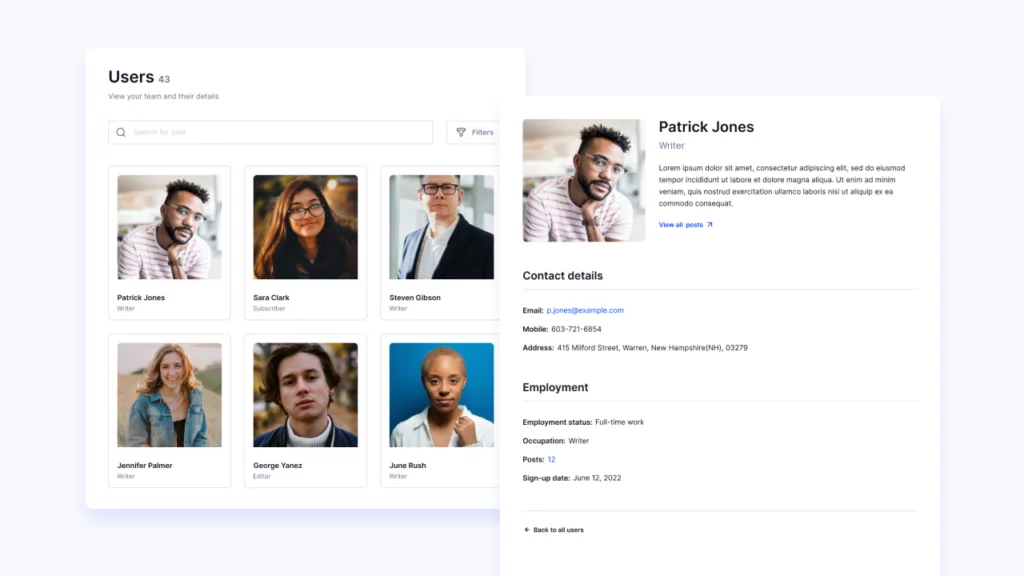
4. Create Member Directories
If you want to create member directories that display all users on your site, you’ll need to activate the User Listing Add-On by going to Profile Builder → Add-ons. Once that’s done, move to Profile Builder → User Listing → Add New:
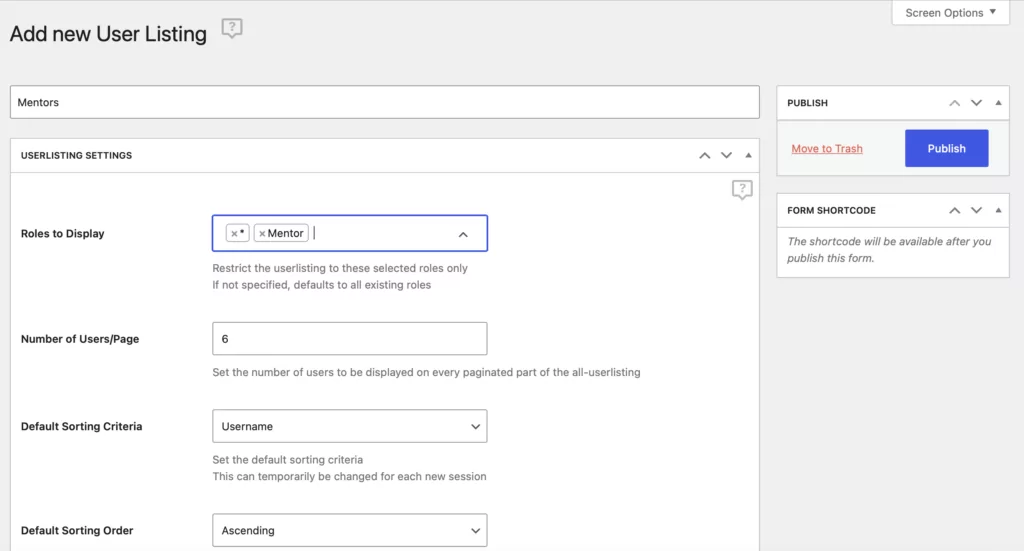
Give your member listing a title and choose which user roles to include. For example, you could create one directory for mentors and one for support group members.
Next, you can customize how the listings get displayed (e.g. the number of users per page, sorting critera, etc). You can also ensure that the listing is only visible to logged-in members, so that not just anyone can access it.
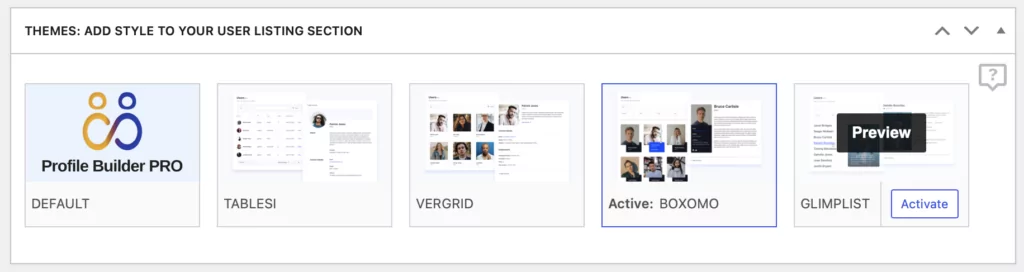
Additionally, you can set up faceted menus so users can search for other members by location, age, or other criteria. Meanwhile, you’ll find a range of pre-made templates that help you design a professional user listing page.
Simply locate the Themes section where you can preview each style before activating one:
Then, add your user listings to any page on your site using the User Listing block which you’ll find in the Block editor. At which point, you can select your listing from the Listing Settings.
5. Add Group Forums
If you want to know how to start a website that offers a supportive online community, it’s a good idea to set up forums. This way, you can create a safe space where users can share their experiences and new members can ask questions.
To do this, you can use the bbPress Add-On which you’ll need to activate in Profile Builder. You’ll also need to install and activate the bbPress plugin separately.
After that, head to Profile Builder → bbPress to replace the default bbPress user listings with your custom Profile Builder ones. Then, go to Forums → Add New to set up your first forum:
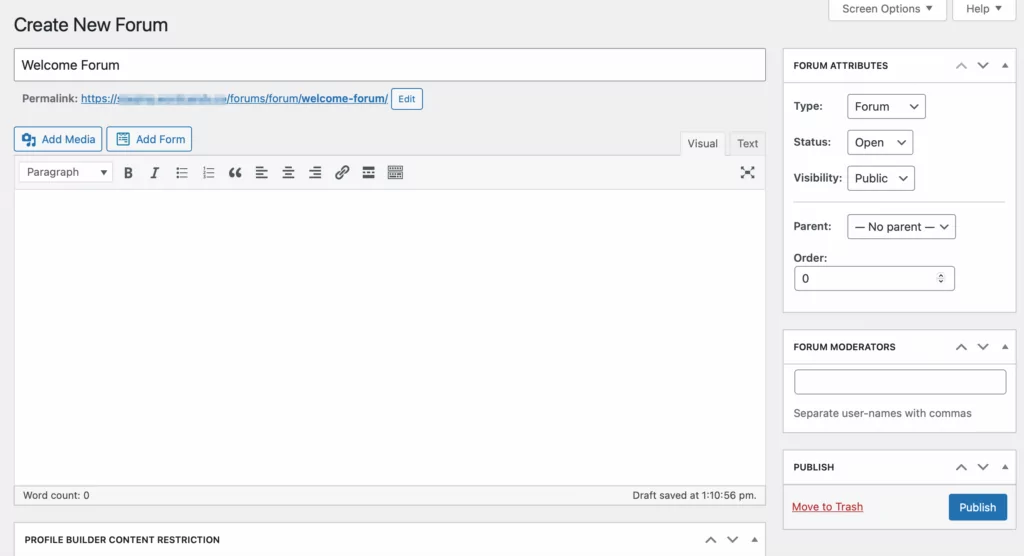
You’ll need to choose a name and add a description. To the right, you can change the status of the forum (open/closed) and adjust the visibility settings (public/hidden/private). You can also add forum moderators to approve comments.
At the bottom, you’ll find the Profile Builder Content Restriction settings. Here, select the relevant user roles to grant access to your forum:
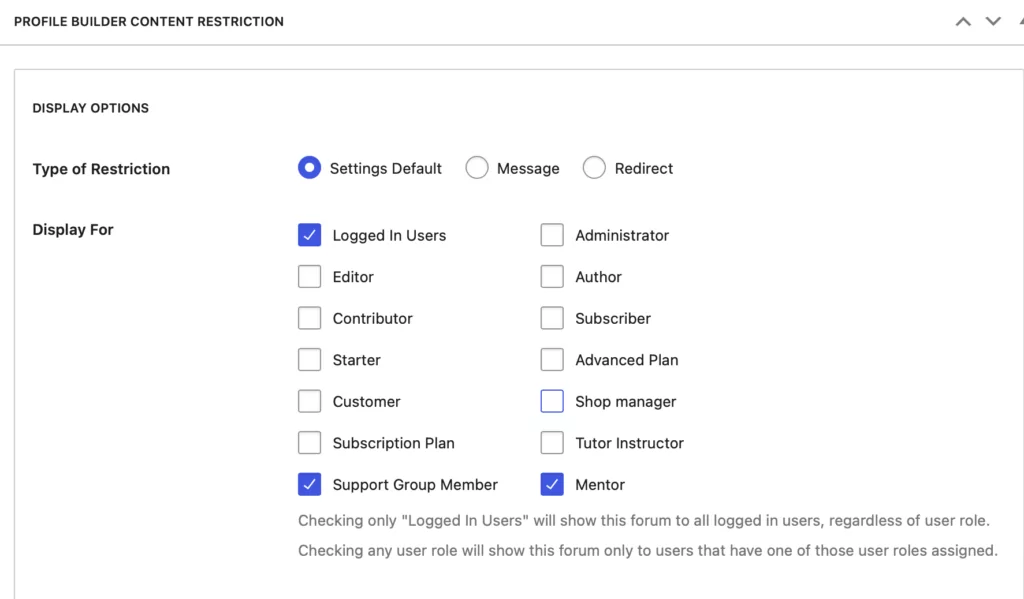
For example, you could limit access to mentors only. Then, publish your forum.
You also have the option to install Paid Member Subscriptions to set up different membership options to restrict forum access by membership level. If you don’t want to charge people to signup to your website, you can always set up free memberships, but this gives you added flexibility when protecting content.
Conclusion
Traditional support groups can be effective, but they can also be restrictive. Plus, the pressure of in-person meetings can be intimidating for new members. Instead, you can set up a digital support group to help people reach their goals, connect with others, and access valuable resources.
To recap, here’s how to start a support group website:
- Set up a WordPress site and install Profile Builder.
- Configure your registration forms.
- Restrict content access to group members.
- Create member directories.
- Add group forums.
Profile Builder Pro
Create beautiful front-end registration and profile forms with custom fields. Setup member directories, custom redirects, cutomize user emails & more using the all in one user management plugin.
Get Profile BuilderDo you have any questions about how to start a support group website? Let us know in the comments below!
Related Articles
Profile Builder Update: No More Profile Builder Hobbyist?
If you’re already a Profile Builder user, you might have noticed some changes around here in the past few weeks. And that’s especially if you’ve purchased the Hobbyist version of Profile Builder. And you’d be right! Some changes did take place within the plugin, and thus, that’s what we’ll talk about in this blog post, […]
Continue Reading
How to Build Online Communities Using Profile Builder & BuddyPress
Building a WordPress community website can be a great idea not only because you can control the experience of the user, manage SEO and inbound traffic, but also because I think a community is more about nurturing a constant, active presence and happy experience. If we speak about the integration between our Profile Builder & […]
Continue Reading
How To Extend bbPress User Profiles with Profile Builder
Letting users customize their profiles is a great way to encourage them to spend more time on your forum website and interact with each other. However, this is not a feature either WordPress or bbPress offers by default. WordPress supports user registration, but provides very little functionality in terms of profile customization. Fortunately, there are […]
Continue Reading