Table of Contents
Call it “Meet the Team”, “Our Team” or “Staff List”, a WordPress Team Page is a pretty standard request when building a new website. That’s probably because everyone wants to know the people behind a specific project. It ads a personal touch to the company and can lend trust to visitors.
Even though there are many ways to go about building a WordPress Team Page, in this tutorial we’re going to focus on making it simple (easy to build) and intuitive (easy to update by clients – mostly non-technical users).
Let’s consider the following scenario:
- we want to have a variable number of team members
- it needs to be easy to add, remove or rearrange team members
- to make it easy to update we’ll need specific fields for team members, like: Name, Title, Bio, Picture, Social Media links etc.
Now here comes the best part. It would be great if we can achieve all of this with a couple of clicks from the WordPress admin UI and without writing a single line of PHP code.
Seems too much of a challenge? It’s actually really doable with a little help from the WordPress Creation Kit plugin and its Swift Templates module.
WCK will allow us to create repeater groups of custom fields for storing team member information, as well as display them in the front-end directly from the WP admin UI.
Here are the simple steps we need to follow:
1. Create the WordPress Team Page
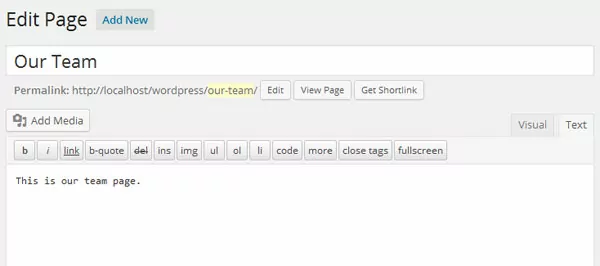
First we need to create a page the will store our team members. For this, in the WordPress admin go to Pages and create a new page called “Our Team”.
2. Install WordPress Creation Kit
Next, make sure you download the WordPress Creation Kit plugin, install and activate it.
WCK will help us create the custom fields (Name, Title, Bio, Picture) that we will attach to our WordPress Team Page.
3. Create the Custom Fields for our team members
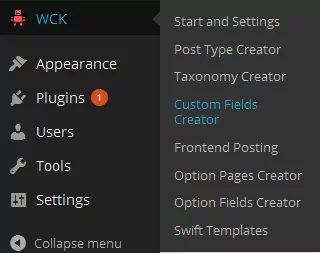
From the WCK tab, select “Custom Fields Creator”.
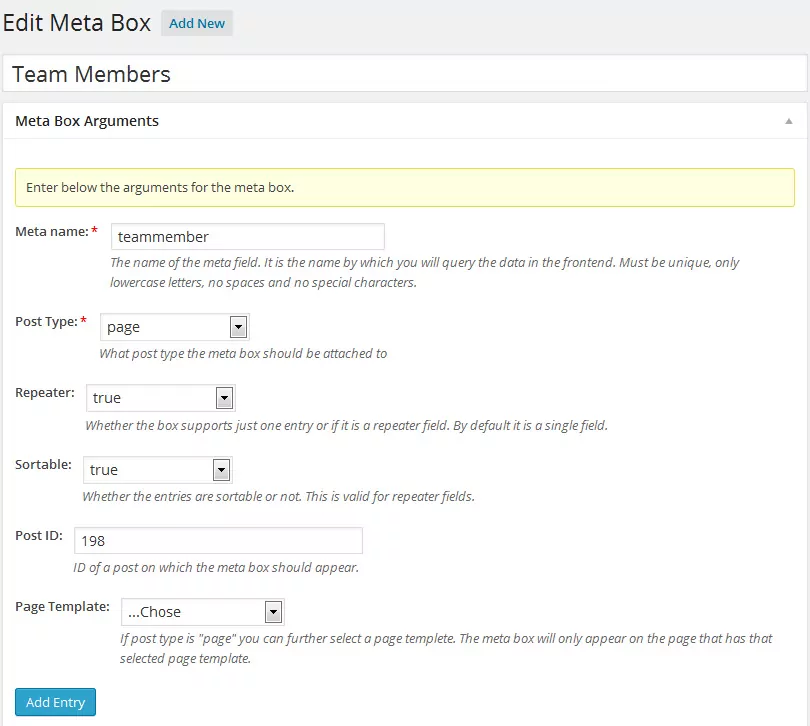
Then click “Add New” Meta Box and name it “Team Members”.
The Meta Box will contain our custom fields.
First we need to insert the Meta Box arguments:
- Meta name: let’s enter “teammember”; this will be the name of the meta field
- Post type – we’ll select “Page”, since we want to attach it to our WordPress Team page called “Our Team”.
- Repeater set to “true”; this will allow us to add as many team members as we need.
- Sortable set to true; we want to be able to change the order in which the team members appear.
- Post ID – insert the ID of the “Our Team” page. This will make sure the metabox with custom fields is attached only to that specific page.
After you finish make sure to click “Add Entry”.
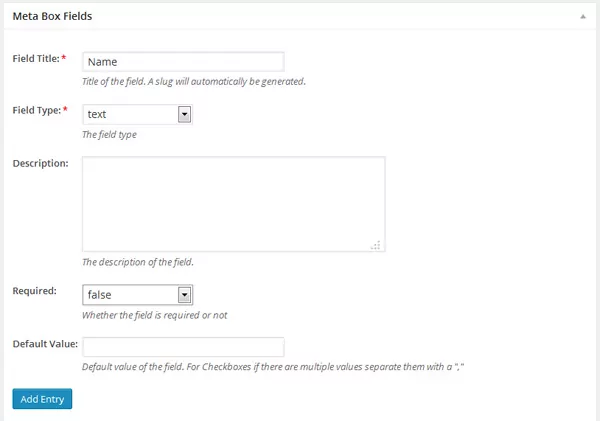
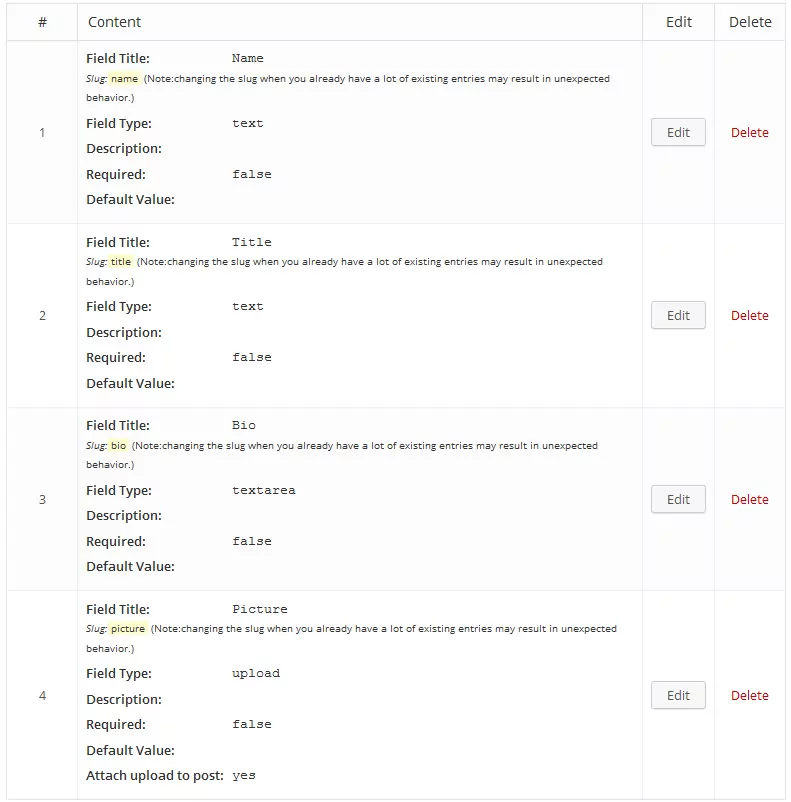
Next, we’ll go ahead and create the custom fields required for a team member.
We’ll add a “Name” and “Title” fields which will be text, a “Bio” which will be a textarea and a “Picture” which will be an upload field.
Make sure to click “Add Entry” after inserting each custom field.
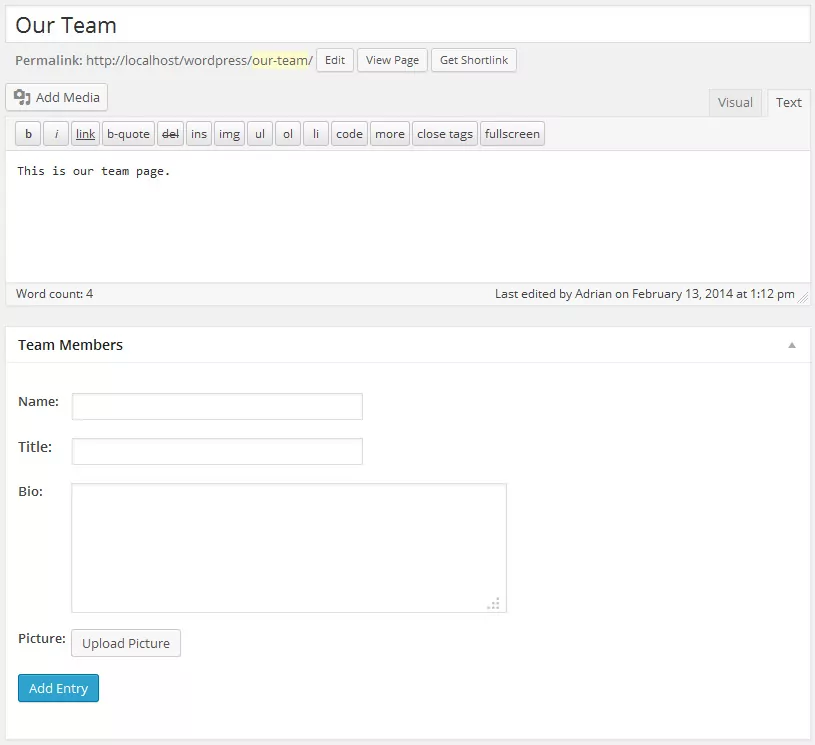
Once you hit “Publish”, you will have a Team Members box attached to the “Our Team” page.
4. Add content to the WordPress Team Page
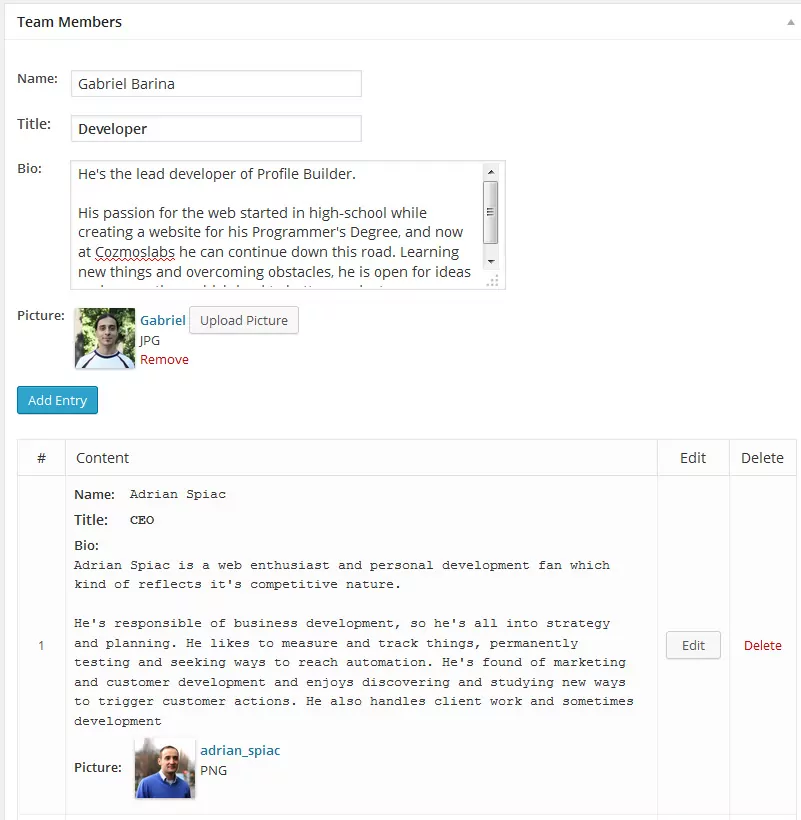
Now you’ll have a bullet proof interface for adding your Team members. And it all looks like it’s part of WordPress.
You can add as many team members as you want, as well as organize them using a drag and drop functionality.
5. Display your Team Members in the front-end
You now have all the team members details attached to the WordPress Team page.
In order to display them in the front-end you would normally have to create a custom page template, assign it to “Our Team” page and write PHP code that outputs the information stored in the custom fields attached to the page.
But we decided we’ll go with the easy way, so we’ll use WCK Swift Templates module to display this information in the front-end.
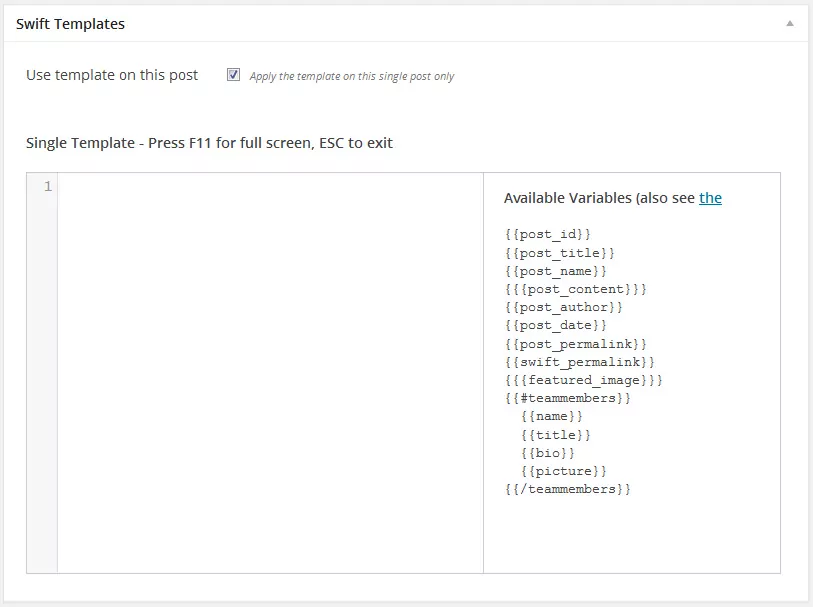
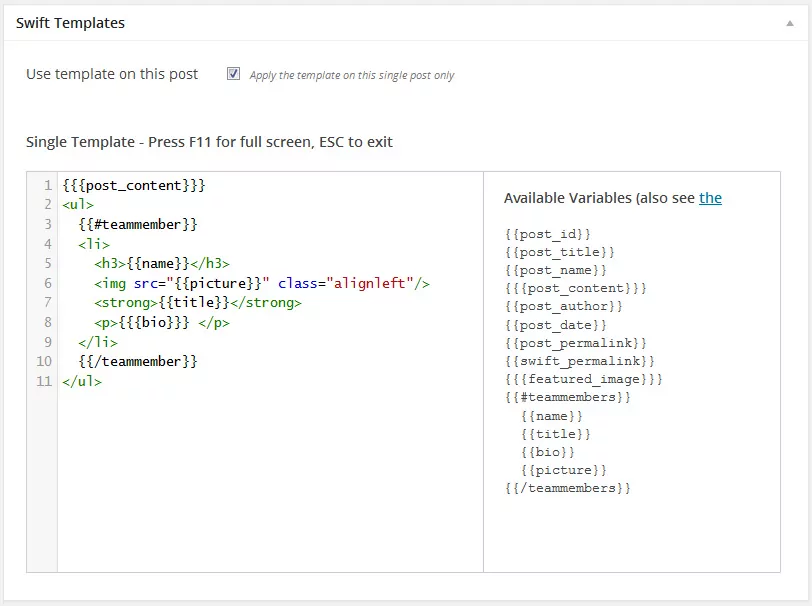
If you have Swift Templates activated, on the Edit screen for the “Our Team” page you’ll see the Swift Templates box.
Make sure to check “Use template on this post”. This will replace the default page template with the template built using Swift Templates interface.
Then you can start creating your template using the available variables in the right box.
We’ll only need to display the post content as well as custom fields with the team member information.
The new template will contain:
{{{post_content}}}

{{#teammember}}
  {{name}}
  {{title}}
  {{picture}}
  {{bio}}
{{/teammember}}
And we can also add a little bit of HTML for a basic layout.
Once you hit “Update” page, you’ll notice your WordPress team page now lists all your team members.
That’s it. In a couple of easy steps we were able to create a clean and streamlined WordPress team page.
Feel free to move forward and style you new WordPress Team page in any way you desire.
Related Articles

5 Free And Easy to Use WordPress Membership Plugins
Free and easy to use WordPress membership plugins are not a myth. Finding and getting started with them is simpler then you might think. Often website owners require visitors to sign up and become members of their platform before allowing access to the content. The solutions for WordPress users are a variety of membership plugins […]
Continue Reading
5 Best WooCommerce Subscription Plugins
Subscriptions are a very common payment model, but WooCommerce doesn’t natively support recurring payments out of the box. This is where the power of using a WooCommerce subscription plugin comes into play. With this tool, you can start selling memberships, subscriptions, and product bundles. This way, you can increase your income through renewal fees and […]
Continue Reading
How It’s Made – A look at the theme and plugins that power cozmoslabs.com
After several years, our website design was no longer in sync with what we wanted from our brand. It was also built at a time when responsive websites were just becoming mainstream and we never took the time to make sure it looks good on smaller devices. While we wanted to do a redesign for […]
Continue Reading



Why not use the User Profile fields already native to WordPress with custom fields?
You need to purchase the professional version of the wordpress creation kit to use swift templates. I wish you mentioned that in the start of the tutorial.
Megan, you’re right. I’ve updated the tutorial so it’s mentioning this from the start.
However, you can still achieve all this with just the free version, if you’re comfortable writing PHP to display your custom fields in the front-end.
Here’s our documentation link on how to do that.